Friday, January 31, 2020

More things you thought were done but aren't.

On top of still fighting with Moen (I'm getting a new faucet, but need to contact them to pay for the shipping,) the new grout right in front of the door is starting to flake out (in a new section) and the patch to the shed door is blowing out.
Not just a little bit, but a lot-of-bit.
Sigh.
The patching material I used was rated for outdoor applications, so It might just be that this is on the north side and stays wet all the time.
This summer I have to figure out how I'm going to solve for this. Might be a metal kick plate across the entire bottom to just cover it up, and rain diverters above the door to keep it drier.

Monday, January 27, 2020

Simple Things

I tried to knock out a bunch of little projects this weekend. you know, the little things that pile up, and then you have a pile of stuff just staring at you?
I got tired of staring back.
I got the Welcome Cow hung up on the porch again. I got a new curtain and curtain rod for the porch too, and got it hung up (What is UP with the crappy screws included with things lately? Nearly stripped those screw heads too - they had oddly small Phillip's holes for such a large screw head.)
I got more coats of shallac on the second half of the porch coat rack. I placed the baseboard molding in the mudroom, but decided against mailing it down until the wall is built out. I cleaned, and tidied and put stuff away that had migrated to places it didn't belong.
Then I decided to replace the closet handle in the bedroom upstairs. Should have taken 5 minutes.

(It is here that the uncomfortable background music would begin to swell is my life were a movie.)
Here we see the unsuspecting heart-ended country-kitchy modern handle.
Other than the fact that it's black, it doesn't match the style of the rest of the
(painstakingly cleaned) hardware.

I looked and looked, and found this handle at a reasonable price.
(I found a lot of other Fabulous handles too, but I have to choose where to spend my $'s)

But lo!
The old handle screws in from the front!

And behold!
New cabinet hardware bolts through from behind!
And has funny little protrusions that have to nestle into the wood.

That's ok, we'll just drill through... crap.
Right into the cross piece that holds the door together.
Which make it too deep for the bolts.

It's time for tools.
Tools will make this better.

1/2 Spade bit to the rescue. It's not pretty, but I bored a hole through the cross piece
to the front board so the bolt would reach. 

Well, it worked.

New handle! Only took me about an hour.
But the form is much better.
All of the other board closet doors will be getting a similar treatment as I go. All the room doors have Blake #1 Norfolk thump latches. Some doors have been a bit cobbled, and I have to find some replacement parts. I also rehung it's main door, which was an exercise of how barrel hinges are handed, and you should really only remove/clean one door worth of hardware at a time, but I got it done.

I find it really funny that they hung the door this way, with the actual handle on the inside, and the bar side in the hallway.
All kinds of mortises were cut into the frame, so while the complete-est in me wants everything to be nice and matchy-matchy, I left it alone.

Handle on the inside. *shrug*.
Quirky.

This room is 95% done, (just needs curtain rods/curtains, and for me to finish the hole grill).

That was Saturday.
Sunday.
Sunday I tried to address the kitchen faucet. I had called them and let them know that it was grinding, and when it was tightened down the faucet head wouldn't swing. They told me it probably needed a new bearing and cartridge, which they sent to me.
I will spare you the gory, lengthy details, but the end result is today I have no water to my kitchen sink and a very strongly worded email out to Moen. If this doesn't get resolved, (quickly), I want my $ back and I need to get a new faucet.
Bearing wouldn't seat without extreme effort, now the whole thing leaks like a fire hose.

Got it back together, but the water's off. Box is impaled on it to remind me not to try to use it.

I also got paint for the master bedroom. I've decided to go with Van Cortland Blue (this is not my house, but here's an example of someone putting it on the walls.)
Still SuperWhite for the trim, and regular old while ceiling paint.
Photos to come!

Tuesday, January 21, 2020

A note about safety

A lot of my friends are jokingly apt to say "Safety Third!"
Here's the deal though. This is an old house. Old houses are inherently more dangerous than new houses, for a few reasons.


"Fibrous tremolite asbestos on muscovite" From Wikipedia
1) Asbestos. This mineral is dangerous if inhaled. It was often used as an insulation, particularly around old furnaces and heating pipes. It's also found in some old siding, because it's darn near impervious to weather if properly maintained. If you have it and you can, just Leave It Alone. Do not break it. Do not make it into anything inhale-able. It's not going to hurt you by looking at it. It's probably not wise to handle it, because by handling it, you're probably creating dust. Don't do that. Unless it needs to be removed, leave it alone. And if it needs to be removed, you're probably best leaving it to professionals. I didn't have any of this, and I'm very, very thankful.


This is what mine sort of looked like. Photo fromEnvironix.
2) Mold. Though you can find this in new homes too, old homes just have had a longer leadtime to get a head start on moisture where you don't want it, and then not-so-suddenly, you have a fungus among us. (Well, fungus among you. I got mine mitigated.) This stuff isn't fun, and can cause a host of health issues. I happen to be allergic to mold. Little spots you can deal with yourself, larger jobs (like up in my attic) might need the help of a pro. Read up on it. Attic mold is not so simple to deal with as, "hose it down with bleach and hope". The little roots of the mold get into the wood to hide there and come back when the time and environment is right.


Knob and Tube. From Wikipedia.
3) Knob and Tube Wiring (K&T). Like asbestos, is not dangerous if left alone in it's original environment. The problem is us modern folks like a nifty thing called insulation. Unless we're gutting the place, older homes usually get retrofitted with blown-in insulation. That's when K&T becomes a huge issue.
K&T is bare metal wire stretched between ceramic insulators in the hollow cavities in your wall that carries electricity from the main box to all the outlets and light fixtures. The wire gets through studs and joists with the help of tubes inserted into holes, shielding the wood from the wire. When you blow in insulation on top of the bare wire, and a current is applied, that's where things go south in a hurry and you can burn your house down.
A lot of times older homes can have a combination of systems as things got added on as times changed. I never had K&T in this house, (thanks for the inspection Wayne!) but there is a mix of fabric covered wire, metal shielded wire, and modern plastic coated wire. Most insurance companies with flip a nutty if they find out you have K&T. I'd have to think long and hard about getting into a property with K&T, because you're looking at having to rewire the place up to code if you want insurance.
There's newer low-voltage systems now that can approximate the look of K&T without the danger since LEDs require so little juice. I have no first-hand experience with these systems other than to say I saw it once demonstrated at a conference. I thought it was neat but not particularly practical.


I make sure to follow these directions when working with the dry product too.
Photo from Wikipedia.

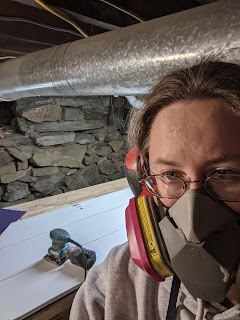
4) Lead. This one have been heavy on my mind because I've been doing a lot of stripping/sanding.
If your house was built before 1978, there's a very high change your house contains lead paint. Again, much like asbestos and K&T, if you leave it alone, it won't hurt you by existing. The big problem comes with absorbing it into your body. With little kids, this looks like chewing on windowsills.

(Something I never understood why anyone would do, and yet my mother admonished me to Never Ever Do It. One day I rested my top teeth on the window sill of my bedroom, just because. The toothmarks may still be there, faintly. I don't really think it counts as chewing. And besides, I'm pretty sure the house was built in '78, so I was doubly safe. Thanks Mom. :) )

In my world today, what that looks like is dust. Lots and lots of dust, which I can breathe or get on me and absorb. Now people might say "Whatever. We've lived around lead our whole lives and we're fine!" And that's true. But it's different living around it and living immersed in it.
I met a guy who was an old window restoration geezer. He'd been working on windows for probably 50 years. He's also the only guy I've ever met who had to have his blood pumped out of his body, filtered through a glorified coffee filter, and reinstalled back in due to acute lead poisoning. Someone had screwed up the air handling at a site he was working on, and he wound up inhaling a great deal of it.
Trust me: You just don't want to be that guy.
And so, Personal Protection Equipment to the rescue!
I have on my way to me certain soaps that claim to de-lead you. I don't know how much is science, but a lot of the window and stained glass people use it, so I will too. I used to just wash up really thoroughly, but there's a peace of mind with magic lead soap.
I also employ my favorite respirator with filters rated to p100 (lead).
Safety first!
I just ordered new filters for that too.

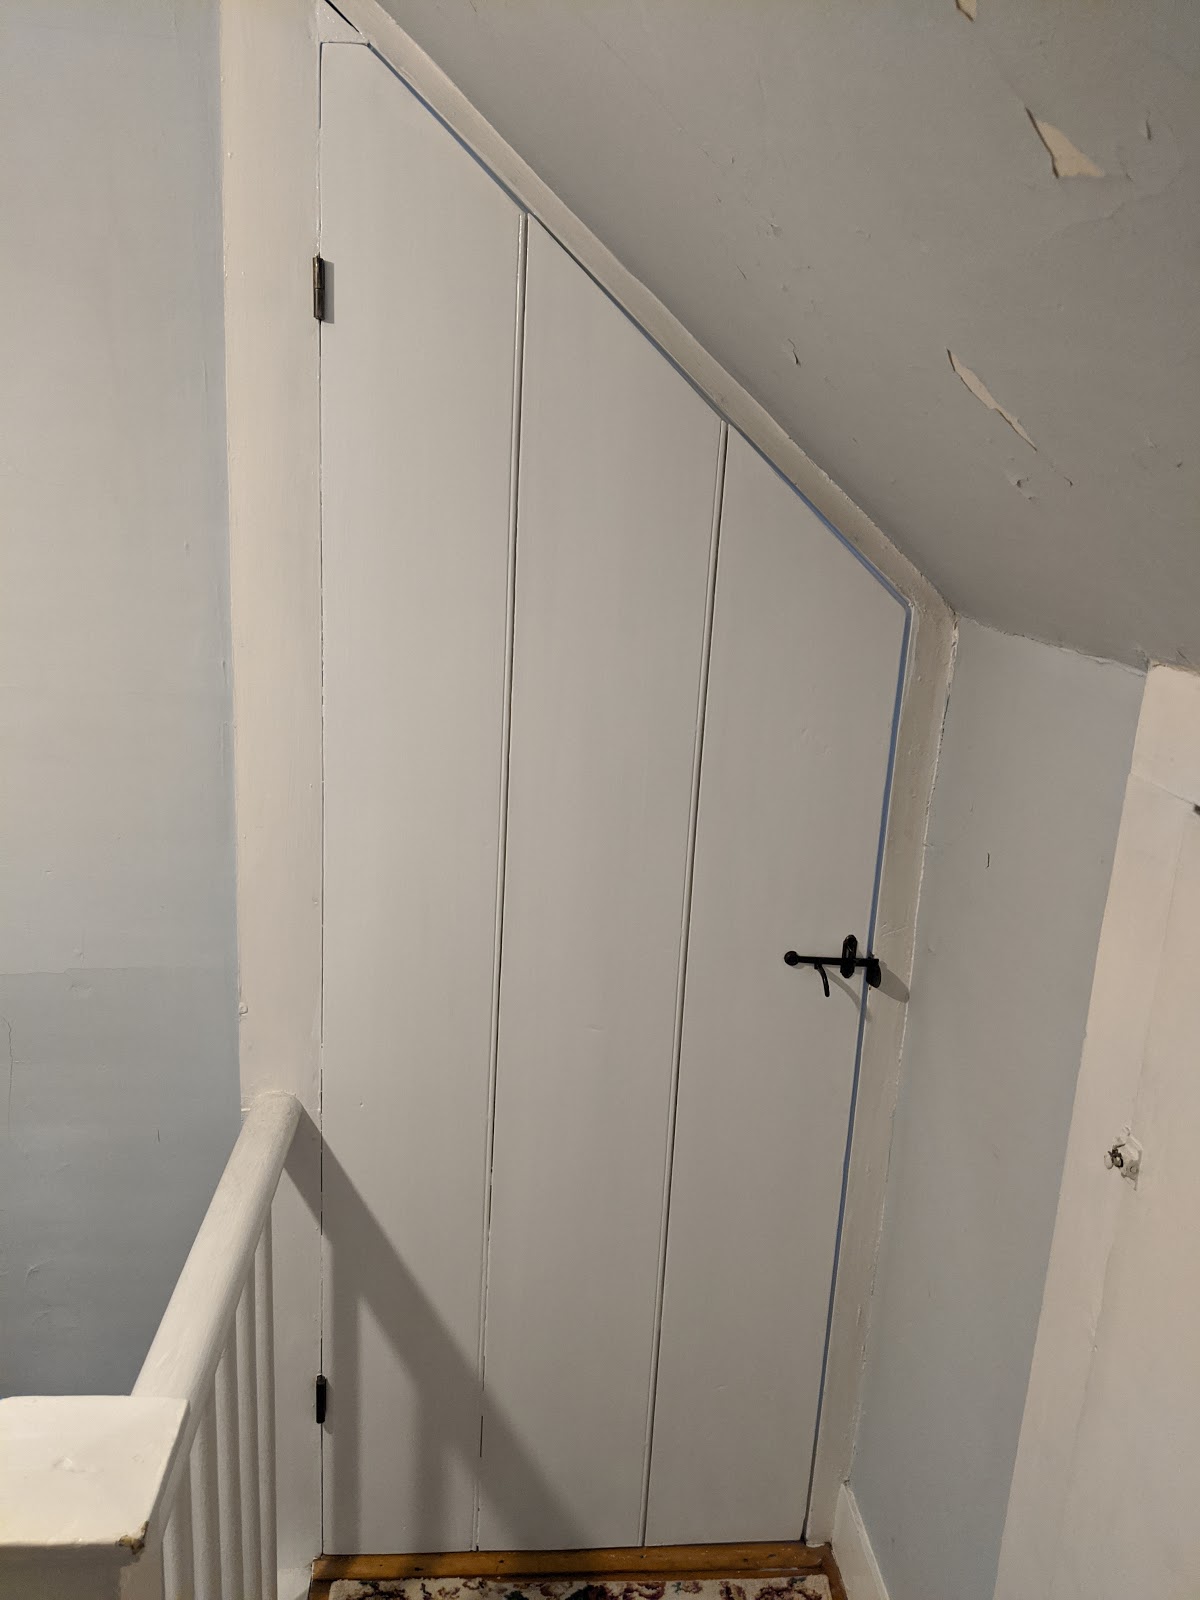
There's other things about old houses that can be unsafe - stair run/rises not up to current code, unstable foundations, forgotten wells that have the gradually filled in but not entirely, electice that isn't labeled right, etc, but those four make the top of my list.


**DISCLAIMER - I'M NOT A PROFESSIONAL,
AND ALL OPINIONS EXPRESSED IN THIS POST ARE EXACTLY THAT.
DON'T GO BUILDING THINGS OUT OF ASBESTOS AND PAINTING THEM
IN LEAD JUST FOR KICKS, MMMKAY?**

Moving along

Over the weekend, I was able to chisel out the old mortar, get some new tile repair stuff, and stick the tile back down.
Boom. Tile replaced.

Then I had to wait overnight for it to cure before I could grout it.
Woke up the next morning, 
And grouted.
So that's checked off. There's another tile that makes me suspicious, but I'm going to wait and see. It's not so obvious as the last one. The grout is blending as it's drying. I'll give it until tomorrow or Thursday before I seal it.

Friday, January 17, 2020

Tile aggrivation

The tile that went down beautifully quickly developed a stress point in one area of the grout. It seems that a tile was loose, and the vibrations caused the grout to pop out. The tile grew looser and looser because it's right in front of the threshold and you step on it every time you walk through the door. Last night I got back down and cut out the grout and popped the tile out.
Well there's your problem.
Notice how there's only a scant bit of mortar sticking to the edges, and nothing in the middle?
Yea. That's not right. It's also the reason it immediately came loose.
At some point this weekend, I will chisel out all the old mortar, clean up the specifically cut tile, and re-stick it down.

Thursday, January 16, 2020

Coat Rack, part the first, conclusion.

We are not going to discuss the words said in order to finish the first half of the coat rack.
We are not going to discuss the broken, and then re-broken screw.
Or the 3 snapped off drill bits.
Or the vice grips that wouldn't grip.
We are just not going to talk about the atrocity that happened to my beautiful coat rack while trying to extract that damned screw.

The hook covers up the worst of it.
It racks coats.
It also racks hats.

Da ta.
Also, I still have a job, which for the last few days has been in limbo.
So that's something.

Tuesday, January 14, 2020

WORDS

I've been working on the coat rack for the porch since before Christmas. Last night I went to do the final assembly.
I had ordered some fancy coat hooks from Signature Hardware for this project. While doing a test fitting, I managed to strip the heck out of some of the screws. I contacted the company and naturally, you can't buy the crappy screws separately.
I had drilled pilot holes for EVERYTHING.
I still managed to snap the head Right Off of their crappy screw last night.
F*$%.

Tonight, I get to see if there's just enough left above the surface to get a pair of vice grips on.
If not that, then I shall see if I can get a screw extractor small enough to thread that #6 screw.
Barring that, I saw a trick where you core out around the screw, break it off and fill the hole with a dowel/glue. I'd hate to have to get to that point though.


In the end - Signature Hardware: Nice hooks, bad screws.

Monday, January 13, 2020

Befores and Afters

One year ago, I was cleaning hardware. And here I am, still cleaning hardware.
Since last year, I've discovered the joy of a good long hot soak in a pan with some dish soap, and lots of elbow grease.

Barrel lift-off hinge before it's bath

Barrel lift-off hinge after a soak and a scrub.

Turnbuckle latch before

Turnbuckle latch after. The house has slumped a little,
resulting in these latches not lining up exactly.
At least it's consistent in that nothing lines up.

Finished refurbished closet door with nice clean hardware.
After scrubbing it, I got all the metal parts good and hot and gave it a good oiling, like a cast iron pan.


I started on the Master Bedroom (#3). Got most of the furniture moved out,
the drop cloths down and the window frames stripped (I could open the windows, it was 70*.
This room might be blue.

According to the window frames, it's been dark brown, light brown, pale yellow, light green, dark green and white.

Ian came over and there was grout time!
Now the tile in the mudroom and porch is so close to done I can smell it.

I also played with the coat rack over the weekend. Here's a piece of raw cherry (in front) against the oiled cherry.
(The oiled looks like it's two different colors, but it's had the same # of coats. Just natural variation.)
The oiled cherry has since gotten 3 coats of shellac.


That was my weekend. Also cleaned the house, filled the bird feeders, and made a big batch of oatmeal. Had a hard time getting moving each day - I'm pretty sure my allergies were in full swing since nothing is frozen.
This week I really want to try to get the first part of the coat rack up and the door to Bedroom #2 done and rehung. Those are my goals.

I would really like this hardware to go live on it's door again, and not on my kitchen counter.

Tuesday, January 7, 2020

Good News!

I got back the results of the radon test - 1.4 pCi/L, far below the EPA standard of 4.
Yay that the radon air abatement has been working!
I have a water test on order to double check that system, and now every other year I'll put out a long-term test to monitor it.
Shout out to AccuStar in Ward Hill MA, the test/lab facility. If you need a radon test, I recommend them.

Monday, January 6, 2020

Where too next?

Last week, I took a minute to look back on the year. Now's the time to look forward.
First up!
• Paint the trim in bedroom #2, repaint the main door to the room, and then rehang it and the closet door with it's newly cleaned and oiled hardware.
• Finish the coat racks for the porch.
• Grout the porch and mudroom tiles.
• Get a real, adult sized refrigerator!
• Potentially have to run water line to the new fridge if I can't find what I want w/o water/ice functions.
• Stud out mudroom wall and move/deal with the position of the electrical in the mudroom.

At some point this year:
• Build a bench for the porch.
• Fix the siding on the shed.
• Put a new roof on the shed.
• Fix the windows on the shed.
• Have to put a new floor in the shed? I need to see what's going on on the wierd dance-floor thing they have down in half of it right now.
• Replace Rose of Sharon with Blueberry bushes.
• Replace clothes line.
• Paint and deal with Bedroom #3.
• Spackle/Paint/deal with Bedroom #4.
• Continue to push back the woods to where it used to be.
• Repoint the brick chimney in the basement.
• Start to point the walls in the basement.

Until then, Pictures!
Tile is coming along!

So is the coat rack. Needs more oil, and to dry in a warmer place than the basement.