Have you ever looked at a recipe and thought to yourself, "That sounds delicious, but it uses 68 different ingredients; I only have 35 of them, and would have to drive to a specialty store to find at least a dozen others, so... never mind."
That is how I felt about the latest project. I knew I was going to have to use ALL of the tools, which meant humping them up from the basement. I knew there was no way I was getting the back door down (and then up) from the basement, what with the bathroom door still in the way down there.
I'd gotten used to being able to leave the back door open this past summer though, and as a result, I got used to the light in the laundry/fridge room. I had an idea in my head to fix this, but dragged my feet, because like I mentioned, it was going to take ALL of the tools.
This past weekend all the stars lined up. My latest window was on it's way to NY so Ian could make sure it fit. (It did!)
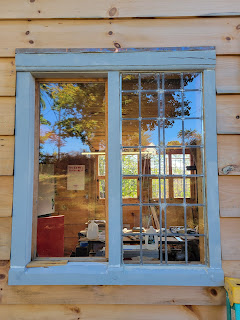 |
The leaded side is fixed. The other side swings in as far as I know.
There's two windows with this setup, so I have to make 1 more fixed at this size and then 2 slightly smaller for the swinging side.
|
I'd removed trim from a 2nd window in the living room, but I wasn't in any hurry to spend what might be the last beautiful day of the fall in the basement. I decided it was time to tackle the back door.
There's projects that you do, and you get 95% of the way there, and then for whatever reason it stalls. I'm sort of there right now with the chimney upstairs - I'm going to put a skim coat of joint compound on it, but I need to wait for the InsulStick to really, truly cure. I was there on the stair way for a long time, unable to get the railing up (it's up now!). That is the deal with this door - I redid the back porch/mudroom a long while ago now, and it looks great. but I left the door, because at the time it was so cold out I didn't want to take it off to refinish it.
Saturday was a the day.
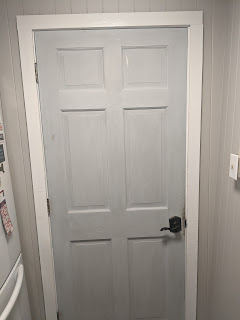 |
Before (from the inside). The whole room used to be painted this dirty light blue color.
It didn't clash too badly with the new paint color, so I let it go. But it had to be updated. |
|
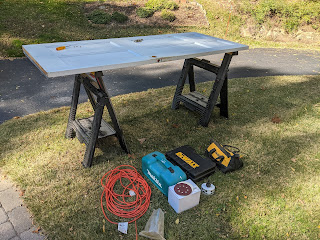 |
Like I said - all the tools. Drill with hole saw, jigsaw, orbital sander. Manual sanders. What a circus.
|
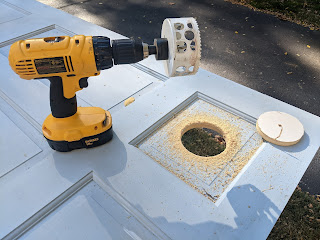 |
Just a note - I hate the hole saw. It's great at what it does, but sometimes if you force it ever so slightly, the blade stops dead and rips the drill out of your hands.
|
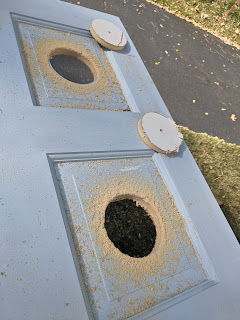 |
Luckily, there were only two holes to be made.
|
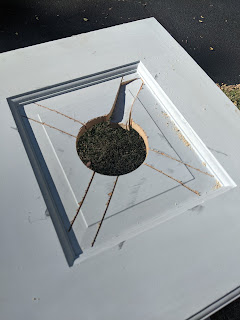 |
Very Carefully cut two parallel diagonal cuts to the corners, being Very Careful not to hit the molded edge.
At this point, I still didn't know if this was a floating panel door. If it was glued together, I was going to be... in for a very long project.
|
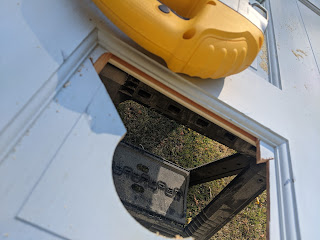 |
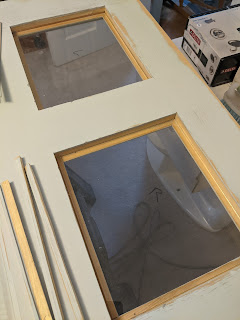
The clouds parted, and the panels fell out - It wasn't glued!
|
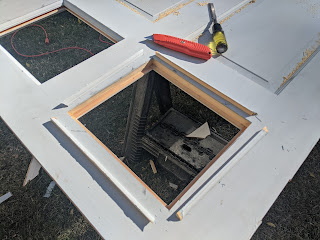 |
At this point I had an idea. If I could very carefully score the molding and cut it away from the door, I could reuse it when I put the glass in. Time for a fresh box cutter blade.
|
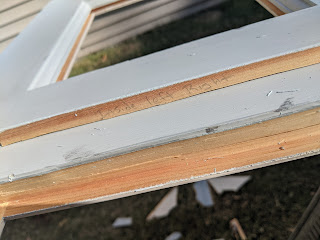 |
SUCCESS! Then remember to label all the little fiddly bits.
The funniest ones are labeled "Inside Left Left" and Inside Right Right"
(As seen from the inside, left panel, left side)
|
At this point, I sanded the crap out of the door. No pictures, but you can imagine the dust flying. It's why I wanted to make sure I did it outside if I could. It didn't need to be stripped (it's not that old); only maybe 2 other coats of paint on it. Thank goodness. I have 3.5 more full sized doors to strip, and it's just not a good time. At this point I dragged the door into the dining room.
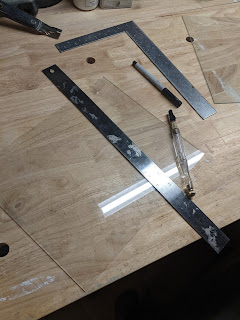 |
I measured and cut the glass out of some old heavy-weight glass someone had given me that came out of an old curio cabinet. I can't use this significantly thicker stuff for the leaded windows, but for this it was perfect.
|
 |
Photographing clear glass stinks. But trust me, when I dry-fit the glass in there, it fit.
|
After cutting the glass, I primed and panted both sides of the door. In this case I used PGG Gripper primer and Benjamin Moore "Advanced" Super White High Gloss (to match the rest of the painted doors and trim.) Gripper works fine for inside projects, and Advanced is great but for 2 things -
1) it has a Very Short Workability Window. It works like oil paint (which it is intended to replace) So you lay it down and move on. There's no touching it up or you're gong to lift the paint and it will look overworked. It is self-leveling on a horizontal surface, which is nice, and when left alone to cure out completely, it's a great finish. However, that cure time?
2) 6 hours to dry-to-the-touch, but can be days before it's fully cured, during which time you can easily leave dings, imprints, smudges, and palm prints. I know this, and I STILL mass up the surface because I get impatient, and it feels dry.
Anyway, at this point I'm done priming and painting.
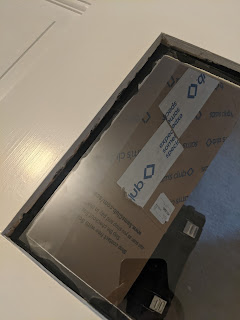 |
All of my Sarco window glazing putty is dried out and full of goobers, so I made do with the black stained glass cement. It's not that this needs to be weatherproof, I just didn't want the glass to eventually rattle the door. It's sort of the same thing - an oil base with calcium powder, and in this case, colorant. Smooshed in a super-thin bed of putty and placed the glass.
|
 |
I used push points for this one. Normally I use old-fashioned triangle points, but the weight of the glass + this being the primary door made me think that these more robust points were the way to go.
|
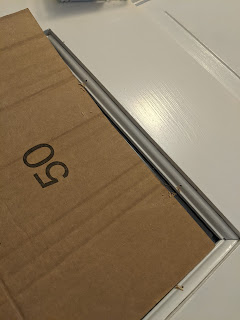 |
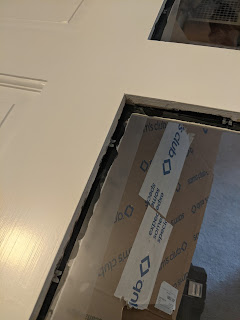
I placed the painted trim bits back in, and drilled pilot holes. There was no way I was going to get to this point and screw it up by not drilling pilot holes and splitting the tiny pieces of wood. Cardboard to make me feel better about being that close to glass with a drill and then a hammer.
|
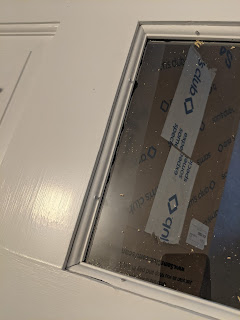 |
| Tapped in the tiny little finish nails with my tiny little carpet tack hammer. This was so nerve wracking. Thought about going and getting the nail set and really burying them, but then I got to thinking- they aren't obtrusive, and if (God Forbid) I ever have to get back under there, I'm going to need something for the needle nose pliers to grab onto. I'm going to leave them just a little proud of the surface. |
|
|
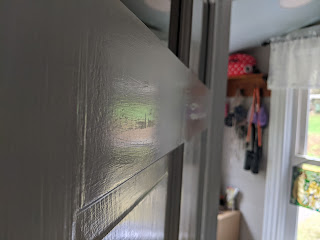 |
This is the finish issue I mentioned earlier. It's hard to see in the photo (and in real life if the light isn't right) but you can see where I flipped the door over too soon to work on the other side. Even though I had cardboard and wax paper down to pad it, it still left a mark in the polish. I don't know if it's enough to warrant me going back and trying to brush another coat over this area.
|
As you can tell from the above picture, there was door hanging. But not before there was hinge shinnanigans. I wanted roil rubbed (or black) hinges to match the rest of the door hardware. and $10 wasn't a huge deal to replace the painted over bright brass ones. Off to Koopman's I went, got the 3.5" black hinges with the correct radius corners, can home and opened the package only to discover that they were all fixed. Meaning, I couldn't take the pin out. Meaning, as a person working alone there's no way on this green marble I was going to be able to mount the door myself. So I went to Lowe's. All of their hinges were fixed too. So I wound up at Home Depot, where thankfully they still stocked black, 3.5, "loose" hinges.
I got the fancy no-squeek ones.
And the door went up! With only a little fussing!
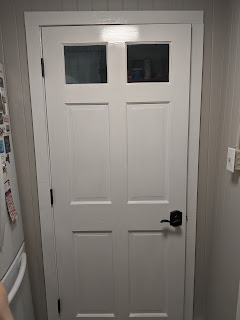 |
Inside facing out.
|
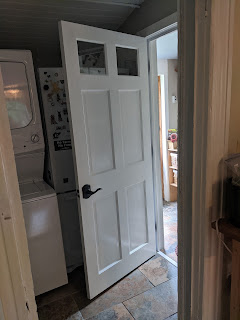 |
| Open! |
I really could not, in my wildest dreams, expect this project to go so well. To the point where I didn't want to talk about it, lest I jink it. The only thing that wasn't 100% was that stupid finish issue, and I'll probably be the only one who ever notices it. The panels came out like they wanted to. The glass mounted in like it was it's mission in life. The hardware all went back on with no fight. It cleaned up beautifully.
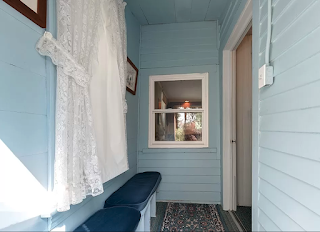 |
Before, from the original listing photos
|
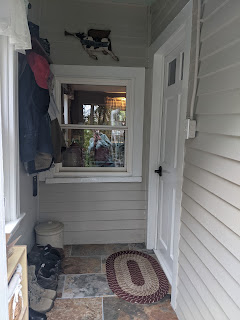 |
After - lived in (obviously not staged), but I think nicer.
|


