Beats the alternative, I suppose, but this year really just feels like 2020 on repeat already.
I'm rather tired of this record skipping.
There's not a ton new to report, I'm afraid. Still no bathroom (but that won't happen now until spring), still no living room windows (that also doesn't appear to be happening until spring). Ian started on one of the damaged house sills, but can't really finish until, you guessed it, spring. (He did cut me nice new window sills for the living room though.)
All of this is triple-y frustrating because I just had three blessed, audacious, weeks off. I don't just get three weeks off ever really; it was a confluence of company-wide vacation time, accrued vacation time, and a changing vacation policy at work that meant I had to use a bunch of it all at once or loose it. I might have one more change to pull off something similar this year, but other than that, the next time I can look forward to that amount of time off I'll probably be unemployed, retired, or deceased.
Yay, capitalism.
I managed to pull a few things out.
I hiked over 40 miles in 3 weeks, so that was something.
I puttered.
 |
You will recall the chimney, as it appeared after having been hidden behind paneling in the back bedroom
|
 |
Then there was the application of InsulStic, which was a saga in it's self.
|
 |
Wet InsulStic
|
 |
Dry InsulStic
|
 |
One coat of drywall compound to smooth.
|
 |
2 coats of drywall compound and a drastic improvement!
|
 |
| And sanded/primed/painted. I really liked the look of "plaster" for this, so I primed and then painted the surface with the ultra-flat white ceiling paint from Benjamin Moore. It's soft, and different enough that you know it's not just a weird detached wall. I'm going to see about getting two pieces of wood and shape them as "filler" to be recessed a little behind in the gaps, so you can't see where the chimney still looks crappy because I can't reach it. |
|
 |
I woke up one day depressed at the lack of progress and decided to make my own progress. Thanks Al's Rubbish for bringing me a dumpster one day and taking it away the next! (Right before the snow!)
|
 |
All of the debris that was supposed to leave when work on the bath room started in September was still sitting in my shed, making it almost unusable. I could barely move around and couldn't get the snowblower out if I wanted to.
After I hauled everything out of the shed and basement that needed to go, I moved everything around and ripped up the weird linolium flooring the former owner had in here from her dance studio days. This white flooring was like a sheet of ice when it would get wet in the winter.
|
 |
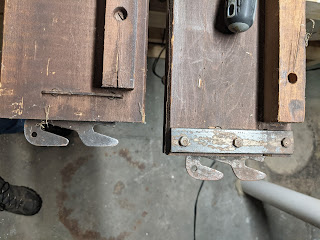
Once Dumpster Fun was over, I started on the 3rd to last window for Ian's Shop.
|
 |
I've got my method pretty dialed in at this point, now it just takes time.
|
 |
I had just enough cement to do this window! Time to order more.
|
 |
It looks great in the sash!
|
 |
It looks dumb next to it's partner.
Sigh.
This is the drawback to not doing paired windows at the same time - you make decisions independent from use, and then this happens.
What's wrong, you ask? It's unbalanced and badly proportioned compared to the one on the left. I hate it, and I'm going to remake it. They will never match because the actual dimension of the windows are different. What I'm going to do is take that column of big center panels of glass in the right hand window, cut them in half vertically, and then move the resulting skinny panels to the outside columns. That way it's more balanced, and you won't notice cheater skinny panels as much.
|
 |
On a nice day, I went outside and cut brush, because that's what you do in the winter. It's been such a screwy winter the sap was running. This is before.
|
 |
This is after. Only 3-4 wheelbarrows full, but sight lines along the road are much improved. This will never be a groomed area - I think I'm going to throw milkweed, aster, and goldenrod seeds down here, that way I can just mow it down in the late fall every year. I may stash a few redbuds behind and along the wall.
|
 |
The last thing I did was also done in a state of sort-of desperation. I'm reaching the end of my rope living in perpetual construction. Other people can turn it off and not see it, but I can't, and no amount of trying will allow me to be able to willfully ignore it. So, despite not having the replacement windows, I started on the living room, washing the ceiling. That's the grunge line between "clean" and not.
|
 |
Gosh, I do love Benjamin Moore's Muresco.
So flat. So conceal-y. Those are the wires for a light fixture that I will address in another post.
|
 |
Then I decided to prime the wall with the mantle. This wall a) has no windows, and b) I always intended to be an accent color, so why not?
|
 |
Ta Da! Accent wall colorized! Just ignore the dumpster fire in the reflection.
But... I thought it was going to be darker...
|
 |
Oh. Because I thought it was. I grabbed the can from downstairs that I thought I had painted the master bedroom - "Van Deusen" blue. I forgot that I chickened out at the last minute and went with the lighter "Van Courtland" blue.
I thought I was putting on the top color in this chip chart. Big difference.
*Shrug* really - It's a ton better than it was, and if I want to take it darker in the future, I can. Easier than trying to back out to a lighter color.
|
So that's what I did on my winter vacation.
Doesn't feel that monumental, but it's something.
Plans for this year:
• Get the windows in and the dang living room done. (Minus the floors. Those will have to wait.)
• Get the bathroom done. Please, please let the bathroom be done.
• Pony up and just get the front step done.
• Rebuild the platform over the well.
• Finish the house sills.
Anything else is gravy, frankly. I want to continue hiking, maybe get a dog, trade in my car for something that isn't a money-guzzling turbo, and plan out my gardens a little better. That's it.
Happy new year!
 |
Wait, what?
Don't you be getting any ideas.
I'm the queen of this castle, lady.
|