Monday, January 10, 2022

A new year. Again.

Beats the alternative, I suppose, but this year really just feels like 2020 on repeat already.
I'm rather tired of this record skipping.

There's not a ton new to report, I'm afraid. Still no bathroom (but that won't happen now until spring), still no living room windows (that also doesn't appear to be happening until spring). Ian started on one of the damaged house sills, but can't really finish until, you guessed it, spring. (He did cut me nice new window sills for the living room though.)
All of this is triple-y frustrating because I just had three blessed, audacious, weeks off. I don't just get three weeks off ever really; it was a confluence of company-wide vacation time, accrued vacation time, and a changing vacation policy at work that meant I had to use a bunch of it all at once or loose it. I might have one more change to pull off something similar this year, but other than that, the next time I can look forward to that amount of time off I'll probably be unemployed, retired, or deceased.
Yay, capitalism.

I managed to pull a few things out.
I hiked over 40 miles in 3 weeks, so that was something.
I puttered.

You will recall the chimney, as it appeared after having been hidden behind paneling in the back bedroom

Then there was the application of InsulStic, which was a saga in it's self.

Wet InsulStic

Dry InsulStic

One coat of drywall compound to smooth.

2 coats of drywall compound and a drastic improvement!

And sanded/primed/painted. I really liked the look of "plaster" for this, so I primed and then painted the surface with the ultra-flat white ceiling paint from Benjamin Moore. It's soft, and different enough that you know it's not just a weird detached wall. I'm going to see about getting two pieces of wood and shape them as "filler" to be recessed a little behind in the gaps, so you can't see where the chimney still looks crappy because I can't reach it.

I woke up one day depressed at the lack of progress and decided to make my own progress. Thanks Al's Rubbish for bringing me a dumpster one day and taking it away the next! (Right before the snow!)

All of the debris that was supposed to leave when work on the bath room started in September was still sitting in my shed, making it almost unusable. I could barely move around and couldn't get the snowblower out if I wanted to.
After I hauled everything out of the shed and basement that needed to go, I moved everything around and ripped up the weird linolium flooring the former owner had in here from her dance studio days. This white flooring was like a sheet of ice when it would get wet in the winter.

Once Dumpster Fun was over, I started on the 3rd to last window for Ian's Shop.

I've got my method pretty dialed in at this point, now it just takes time.

I had just enough cement to do this window! Time to order more.

It looks great in the sash!

It looks dumb next to it's partner.
Sigh.
This is the drawback to not doing paired windows at the same time - you make decisions independent from use, and then this happens.
What's wrong, you ask? It's unbalanced and badly proportioned compared to the one on the left. I hate it, and I'm going to remake it. They will never match because the actual dimension of the windows are different. What I'm going to do is take that column of big center panels of glass in the right hand window, cut them in half vertically, and then move the resulting skinny panels to the outside columns. That way it's more balanced, and you won't notice cheater skinny panels as much.

On a nice day, I went outside and cut brush, because that's what you do in the winter. It's been such a screwy winter the sap was running. This is before.

This is after. Only 3-4 wheelbarrows full, but sight lines along the road are much improved. This will never be a groomed area - I think I'm going to throw milkweed, aster, and goldenrod seeds down here, that way I can just mow it down in the late fall every year. I may stash a few redbuds behind and along the wall.

The last thing I did was also done in a state of sort-of desperation. I'm reaching the end of my rope living in perpetual construction. Other people can turn it off and not see it, but I can't, and no amount of trying will allow me to be able to willfully ignore it. So, despite not having the replacement windows, I started on the living room, washing the ceiling. That's the grunge line between "clean" and not.

Gosh, I do love Benjamin Moore's Muresco.
So flat. So conceal-y. Those are the wires for a light fixture that I will address in another post.

Then I decided to prime the wall with the mantle. This wall a) has no windows, and b) I always intended to be an accent color, so why not?

Ta Da! Accent wall colorized! Just ignore the dumpster fire in the reflection.
But... I thought it was going to be darker...

Oh. Because I thought it was. I grabbed the can from downstairs that I thought I had painted the master bedroom - "Van Deusen" blue. I forgot that I chickened out at the last minute and went with the lighter "Van Courtland" blue.
I thought I was putting on the top color in this chip chart. Big difference.
*Shrug* really - It's a ton better than it was, and if I want to take it darker in the future, I can. Easier than trying to back out to a lighter color.

So that's what I did on my winter vacation.
Doesn't feel that monumental, but it's something.

Plans for this year:
• Get the windows in and the dang living room done. (Minus the floors. Those will have to wait.)
• Get the bathroom done. Please, please let the bathroom be done.
• Pony up and just get the front step done.
• Rebuild the platform over the well.
• Finish the house sills.

Anything else is gravy, frankly. I want to continue hiking, maybe get a dog, trade in my car for something that isn't a money-guzzling turbo, and plan out my gardens a little better. That's it.

Happy new year!

Wait, what?
Don't you be getting any ideas.
I'm the queen of this castle, lady.


Thursday, December 9, 2021

Sweeps!

 In my continued effort to keep warm air in and cold air out, I managed to find unobtrusive door sweeps for both the kitchen door and the door going upstairs. I hated drilling into my freshly refinished doors, but it's a little better now, and I don't have to jam towels under the door except on the most bitter nights.

Kitchen Door - It looks like it belongs on there. I had to put it on the outside because that's where the nice straight threshold will touch.

No light coming through, which means no air coming through! (Or at least less.)

Sweep on the stairs door.

Well... it's... better. A smaller gap, anyway.

Next up in the air containment projects is extending the weird door trim for the stairs door. I've cut the piece to fit, complete with notched angle. I'm just waiting on the paint to dry.

The door closes against this. Why doesn't it go all the way up?

This is the gap at the top of the door when it's closed. I don't get why they didn't just run it up to the ceiling. It must have served some purpose at some point to have that gap there. It appears intentional.

The other thing I'm considering is changing out the hardware on the stairs door. When it was cover in 6 coats of paint, friction and gravity held it closed. The hinges were balanced such that after the half-way point it would swing close on it's own. While I managed to balance the hinges when I replaced them (GO ME!), not there's nothing keeping it closed. If the cat was more ambitious, she could flip it own with a paw. 

Decision time!

Do I want to keep the cute, inexpensive knob because it's pretty?

It's a glazed blue ceramic cabinet knob. Sorry about the bad picture.

Or do I want to install a new old-style latch, which I already own?

It would look sort of like this, as you head up the stairs. Because of how the door is put together, the thumb-latch part would have to go on the other side.


Tuesday, December 7, 2021

That time of year

Things have gotten a little crazy, what with holidays and work. If I'm posting once a month, I figure that's a good thing!
I have a 3 week vacation coming up over Xmass, so I'm hopeful to get a ton of things done. (Which should result in a ton of pictures!)
Of course, I'll be happy if I can even get 1/2 of that ton actually done.
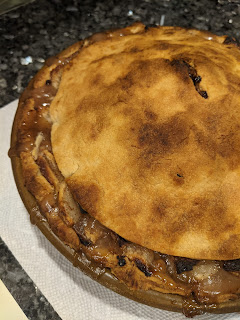
It's the pie time of year.
 

Let's see - what have I been up to? Stripping paint. Endless miles of trim. Last I left you, I'd ripped out most of the carpet in the living room, (pull the last out from under the TV stand last night), and started ripping out the baseboard. The intent was to take out all the baseboard and just replace it with new rather than trying to strip it, in an attempt to do something easier. After yanking out that bug damaged one, I decided that given all the rusty square nails holding them to the wall it would actually be easier to "just" strip it in place.

If you've missed previous updates, nothing about stripping paint is easy, FYI. Chemical strippers are messy and corrosive; heat stripping is dusty and slow. I can do about 5' of 6" wide trim in about 2 hours with the heat gun, more if they are loose pieces down on my workbench.

I pulled up the shoe molding from around the bottom of the baseboard and discovered there's really no insulation back there. These are the cavities that they would have shot full of expanding foam if I had opted for the "rim joist" insulation when MassSave did their thing. The issue with expanding foam insulation is that it essentially encases your wood timbers in plastic and nothing can breathe, so it just rots. This old house needs to be able to breathe, at least a little.
Finding the balance between it breathing and me freezing is the key.
I took the shoe molding down stairs and sanded it. (It had only been shellaced). I'll give it another light sand, maybe stain and re-shellac it. It's not in terrific condition, but it's salvageable without having to paint over it.
In terms of insulation, I'm investigating rock wool and wool-wool insulation, because I figure it's "pokeable" into the small gaps and holes without having to open up the whole walls. I REALLY don't want to have to open up these walls. It's just more work than I want right now. Spray foam would be easiest, but for the reasons I mentioned is right out.
My goal is to having the living room realtor-acceptable-grade by the end of my winter vacation, on 1/9. That doesn't sound difficult, but I have 20' of trim left to strip, the main door and the closet door to strip, the walls to fix, then every thing to sand, wash, prime and paint. I'm not even entertaining refinishing the floors right now. That might not be something I ever do. Maybe it will be my parting gift to the house when I move out some day, (floors are MUCH easier to do when you don't already live somewhere). We'll see.

In other news the Bathroom Guy, already so delayed this year due to supply and crew issues, has Covid. He sounds miserable. He's had to sit down the whole crew for a while, and was honest in that he's not sure what this is going to do to his schedule. Upon finding this out, and with the temps going down to below freezing at night I went to Lowes, burned some gift cards and got some tiny sheets of board insulation and a roll of mylar bubble insulation. I've covered the holes as best I can. I'm not keen on the idea of them pulling the roof (and re-shingling) the bathroom in winter in New England. I'm equally not as keen on exposing the one room with the majority of freezable pipes to the elements of winter in New England. Burst pipes are the last thing I need. So... Stay tuned. This does give me a little more time to think about tiles and things. Current plan is for him to still do the foundation work and the windows, and wait on the major bathroom gut until the weather turns better in the spring. Fingers crossed.

The bug-eaten baseboard is out!

The bug-eaten stud is not compromised! That damage is superficial.
And the sill area under this that was damaged has now been mostly fixed by Ian and Windy. There was a confluence of moisture and sap wood that allowed for bugs to get in, but both of those things have now been dealt with, (and a liberal amount of TimBor applied so it should never happen again.)

One of the mouse holes in the corner. Has now been stuffed full of copper mesh.

A wind brace hiding in the corner, along with snaked electrical that goes Lord Only Knows where.

It got cold, and the window trim in the living room had been doing a remarkable amount of insulating. Since the trim is going to go right back up over these areas, I taped the plastic to the wall and shrunk it on. The tape will pull the finish right off, but it will be covered up in this case. I'm warmer, for now.

Insulation Made-do. The silver does brighten the area up, even if I feel like I'm showering in some weird redneck space station.

This hole was big enough to require more structure, thus the board insulation.


This is the pattern. I tell myself that you eat an elephant one bite at a time. I'm trying to intersperse the long-haul projects with littler ones so that I have some quick wins to celebrate.
The furry roommate would like the take a moment to celebrate her new heated bed. Since I took out the carpet, the floors are quite cold, so I figured this was the least I could do for her.

Heated beds are the BEST.

(I'm going to live in blissful ignorance of my electric bill until it comes in. Hopefully with the dehumidifier running less, I won't notice it.)


Wednesday, November 3, 2021

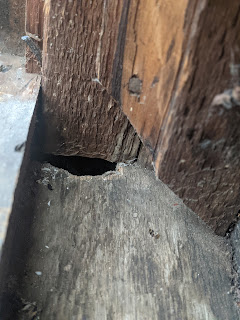
Surprise! Hole in the wall!

 Working on the living room, and decided to see how far the insect damage went. Rather than strip the trim, I'd resolved to just replace it. It's true 1" x 6.5" base board boards - nothing fancy - no molding, just a slight bevel at the top that isn't noticeable unless you're me. So I got out the tools and gave it a go.

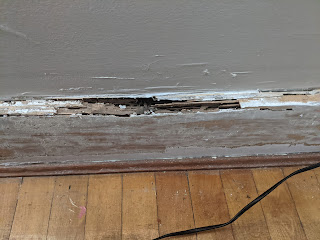
The damage. This had been full of caulk until I hit it with heat and it turned to bubble gum on my scraper. It's been a while since I addressed this. Most of the wood in this section was hollow flakes between the chewed out cells.

I blew through the hollow section, yanked part of the board, and found what I'd suspected - The trim is original, and there had been plaster above (bits of plaster keys remained in the wall.) They replaced the plaster with drywall at some point, but didn't pull the trim and run the drywall behind it - they just stacked the drywall on top of the base board. And it seems like super thin drywall.


This base board is held on with square spikes - very rusty spikes. This stuff does not want to come off. It's not going to be as simple as "pull of old, insert new". It's going to be a challenge on how to fix the walls. Do I extend the drywall down? That would certainly make the room warmer, but it's going to add time I didn't factor in.

In other news, Bathroom Guy called - I'm #2 on his list, and he should be by to measure the living room windows at some point this week. (So exciting!)

Monday, November 1, 2021

Weekend trials

It started out with a vacation day, that then turned into only 80% of a vacation day, when a meeting got scheduled that I couldn't miss. Then it rolled into an order I placed online for materials to insulate my bee hives, only to show up to find out they let me order something they didn't have in stock. Then lots of driving, and getting really nothing accomplished with my vacation day, a day so precious to me because I don't get to dictate how my time is spend 5 days a week. The paycheck dictates how that time is spent.

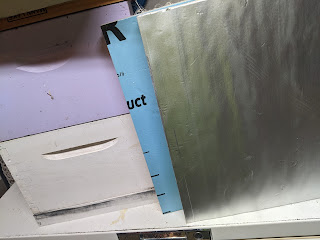
But I got home to the  folk's, and after cooling off and eating dinner, Mom helped me construct some bee cosies. Or Bee-glos, if you will. Using nothing but 2" insulation board and a roll of Zip flashing tape, we came up with 4 snuggies for the bees for the winter.

A mock hive I built in the basement to test fit everything, and some of the board used for insulation.
The stuff is great (R13!) but is embedded with fiberglass, which made it a pain to work with.

Our stack of completed bee cosies, waiting to go on the hives. The fronts swing open so I can slip them over the backs and then duct tape it shut.
It was too wet for me to do this past weekend. Fingers crossed for this week.

Sunday dawned bight and cheerful. Which was nice, but unexpected. I thought it was going to rain all day like Saturday, and had so planned to work on one of Ian's windows in the basement. If the sun was going to be out, there was no way I was spending all day in the basement. After cleaning and tidying, the cat barfing on the carpet for the 43rd billion time, and finding a mummified snake behind the couch in a moth glue trap*, I thought, you know what? It's time for this living room carpet to go. I need to know what is going on in here and how things are getting in.

*Yup, you read that right. Loud words were said. A lot. For a while. Snakes can live in the basement in the winter, they can live in the yard all year round, but they Can Not live in my living space. A very distinct line has been crossed and interlopers will not be tolerated. I have to refinish this room to get rid of any access points.

I get it. Carpets are warmer. They deaden sound.
But I just can't get around having covered up this.

I have to cut it out in strips - Move some stuff, then cut out more strips. Everything could come out but the couch. Not sure how I'd ever manage getting the floor refinished, though I'd really like to. Hrm.

They aren't in the worst, or best shape. The carpet padding was disintegrating, and particles in it had started to melt and adhere to the floor. This had happened to a lesser extent in the office. Some of it
scrubbed off.

This image is very kind, and where I stopped for the night. I had to cut out a notch for the floor register (10x14") so it would sit down properly.

Here's a shot of the odd wear/fading and finish/carpet padding buildup.

They do clean up pretty nicely. I almost wonder if I sanded them lightly with the orbital and hit it with some oil if it would work. It feels like hard maple.

Nice bonus is that I get back almost an inch of vertical space! You don't think an inch is much, but it does feel like it makes a difference.

One of two access points. This is the gap between the floor and wall trim. It was behind that hard to see trim in the foreground.. and much of it had been stuffed with rope caulk.

The more likely access point. Ancient insect damage that comes right up from the sill into the trim. Once upon a time it had been filled with caulk until I started stripping it. Now it's just all going to get removed and replaced.

I'm about 2/3 done removing the carpet. And I know that I'm doing this backwards - I should have fixed and painted the walls and ceiling first while the carpet that I didn't care about was down. But I needed to do something that was immediate, apparent, and felt like a victory. Revealing this floor ticked those boxes, and allowed me to do something that wasn't in the dark basement.