Tuesday, January 19, 2021

Final Countdown

 This past weekend, I reflected on race relations in this country and took a long walk in the woods. Also, finished the second to last project on the second floor, the last hallway closet door.

Let's jump in the way-back machine!

This is the original listing photo. Notice the use of light to gloss over the failing plaster, and the choice camera angles so you don't notice the badly rehung closet door to the right. Even here that door isn't closing though. Creative job, photographer.


This space saw pretty extensive plaster repair, water damage repair, all new paint, and all painted doors saw some form of attention. Hardware was stripped and added to where appropriate, with the right had closet door seeing the most extensive work.

Here we are now:

ta da. I don't have a wide-angle camera, so this is what we've got.

The grill has been added over the heat hole. The hardware is as match-y as I can reasonably afford. I left the pitched area white to reflect light instead of painting it blue like they had it. I'm much happier with the liftoff hinges replaced on the closet door, but sad that the modern replacement ones are so stinking deep. Because these panel doors are relatively thin, it means the hinge juts out into the space more than the originals you can see on the left. They are also substantially taller, but far less offensive than the surface mounted brass hinges that were here when I got here. I'm not thrilled with the weight or depth of screws that were supplied with these hinges, and I might replace them with something more robust in the future.

Door before:

Stanley surface hinges, Victorian catch, useless handset, all painted over

Door After:

Modern liftoff hinges, reversed handset (with cannibalize parts from elsewhere in the house)

I know it's no big thing, but it's a detail that feeds into the cohesive Whole Visual Story. Was what there worked? Sure. Sort of. But it wasn't consistent. It was a visual hodgepodge that didn't play well together. The more things I bring into alignment, the more details like this, if not addressed, stick out like a sore thumb.
It's now perfectly clear from the minute you go upstairs that one end of the hallway is Old, and the other end of the hallway is Not As Old. It's not a weird blend

The last major project of the upstairs is the chimney.

Here's looking at you, kid.
(Please ignore the extension cords, it's the only way to live in this room.)


Wednesday, January 13, 2021

What's next?

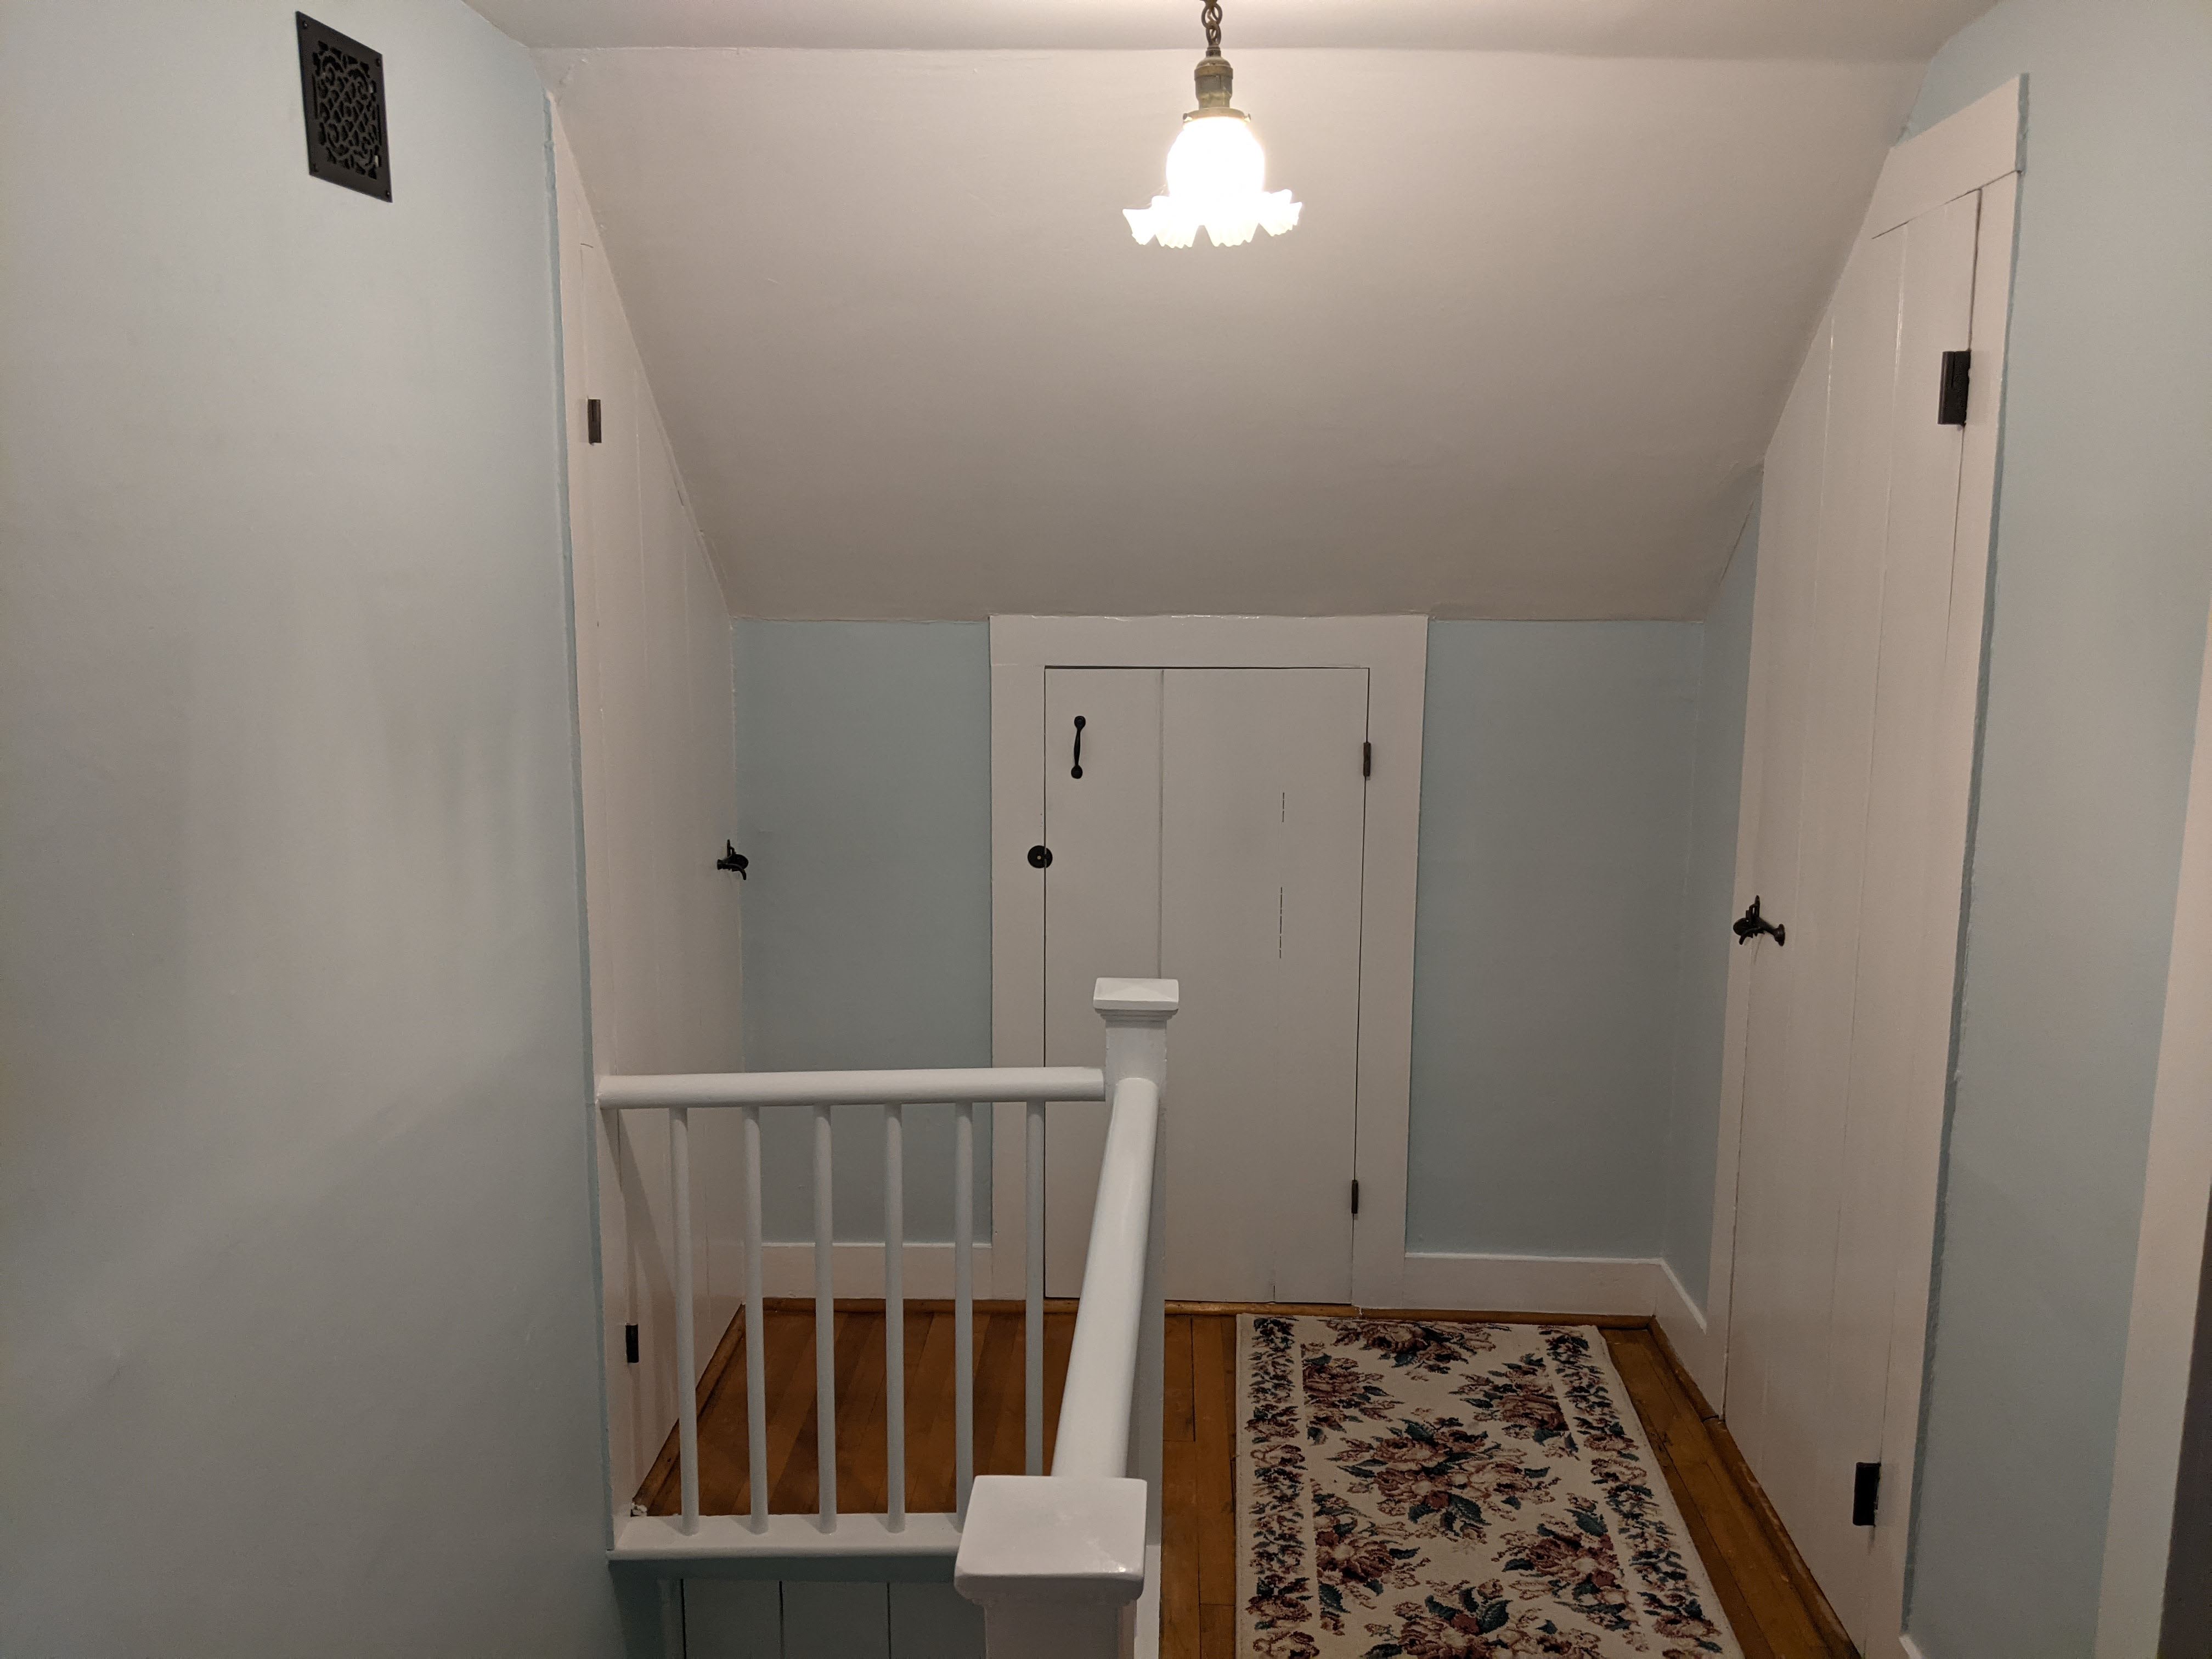
 The turning of the year resulted in some reflection, and now to some planning. What's next? What's left? Let's start upstairs (2nd floor):
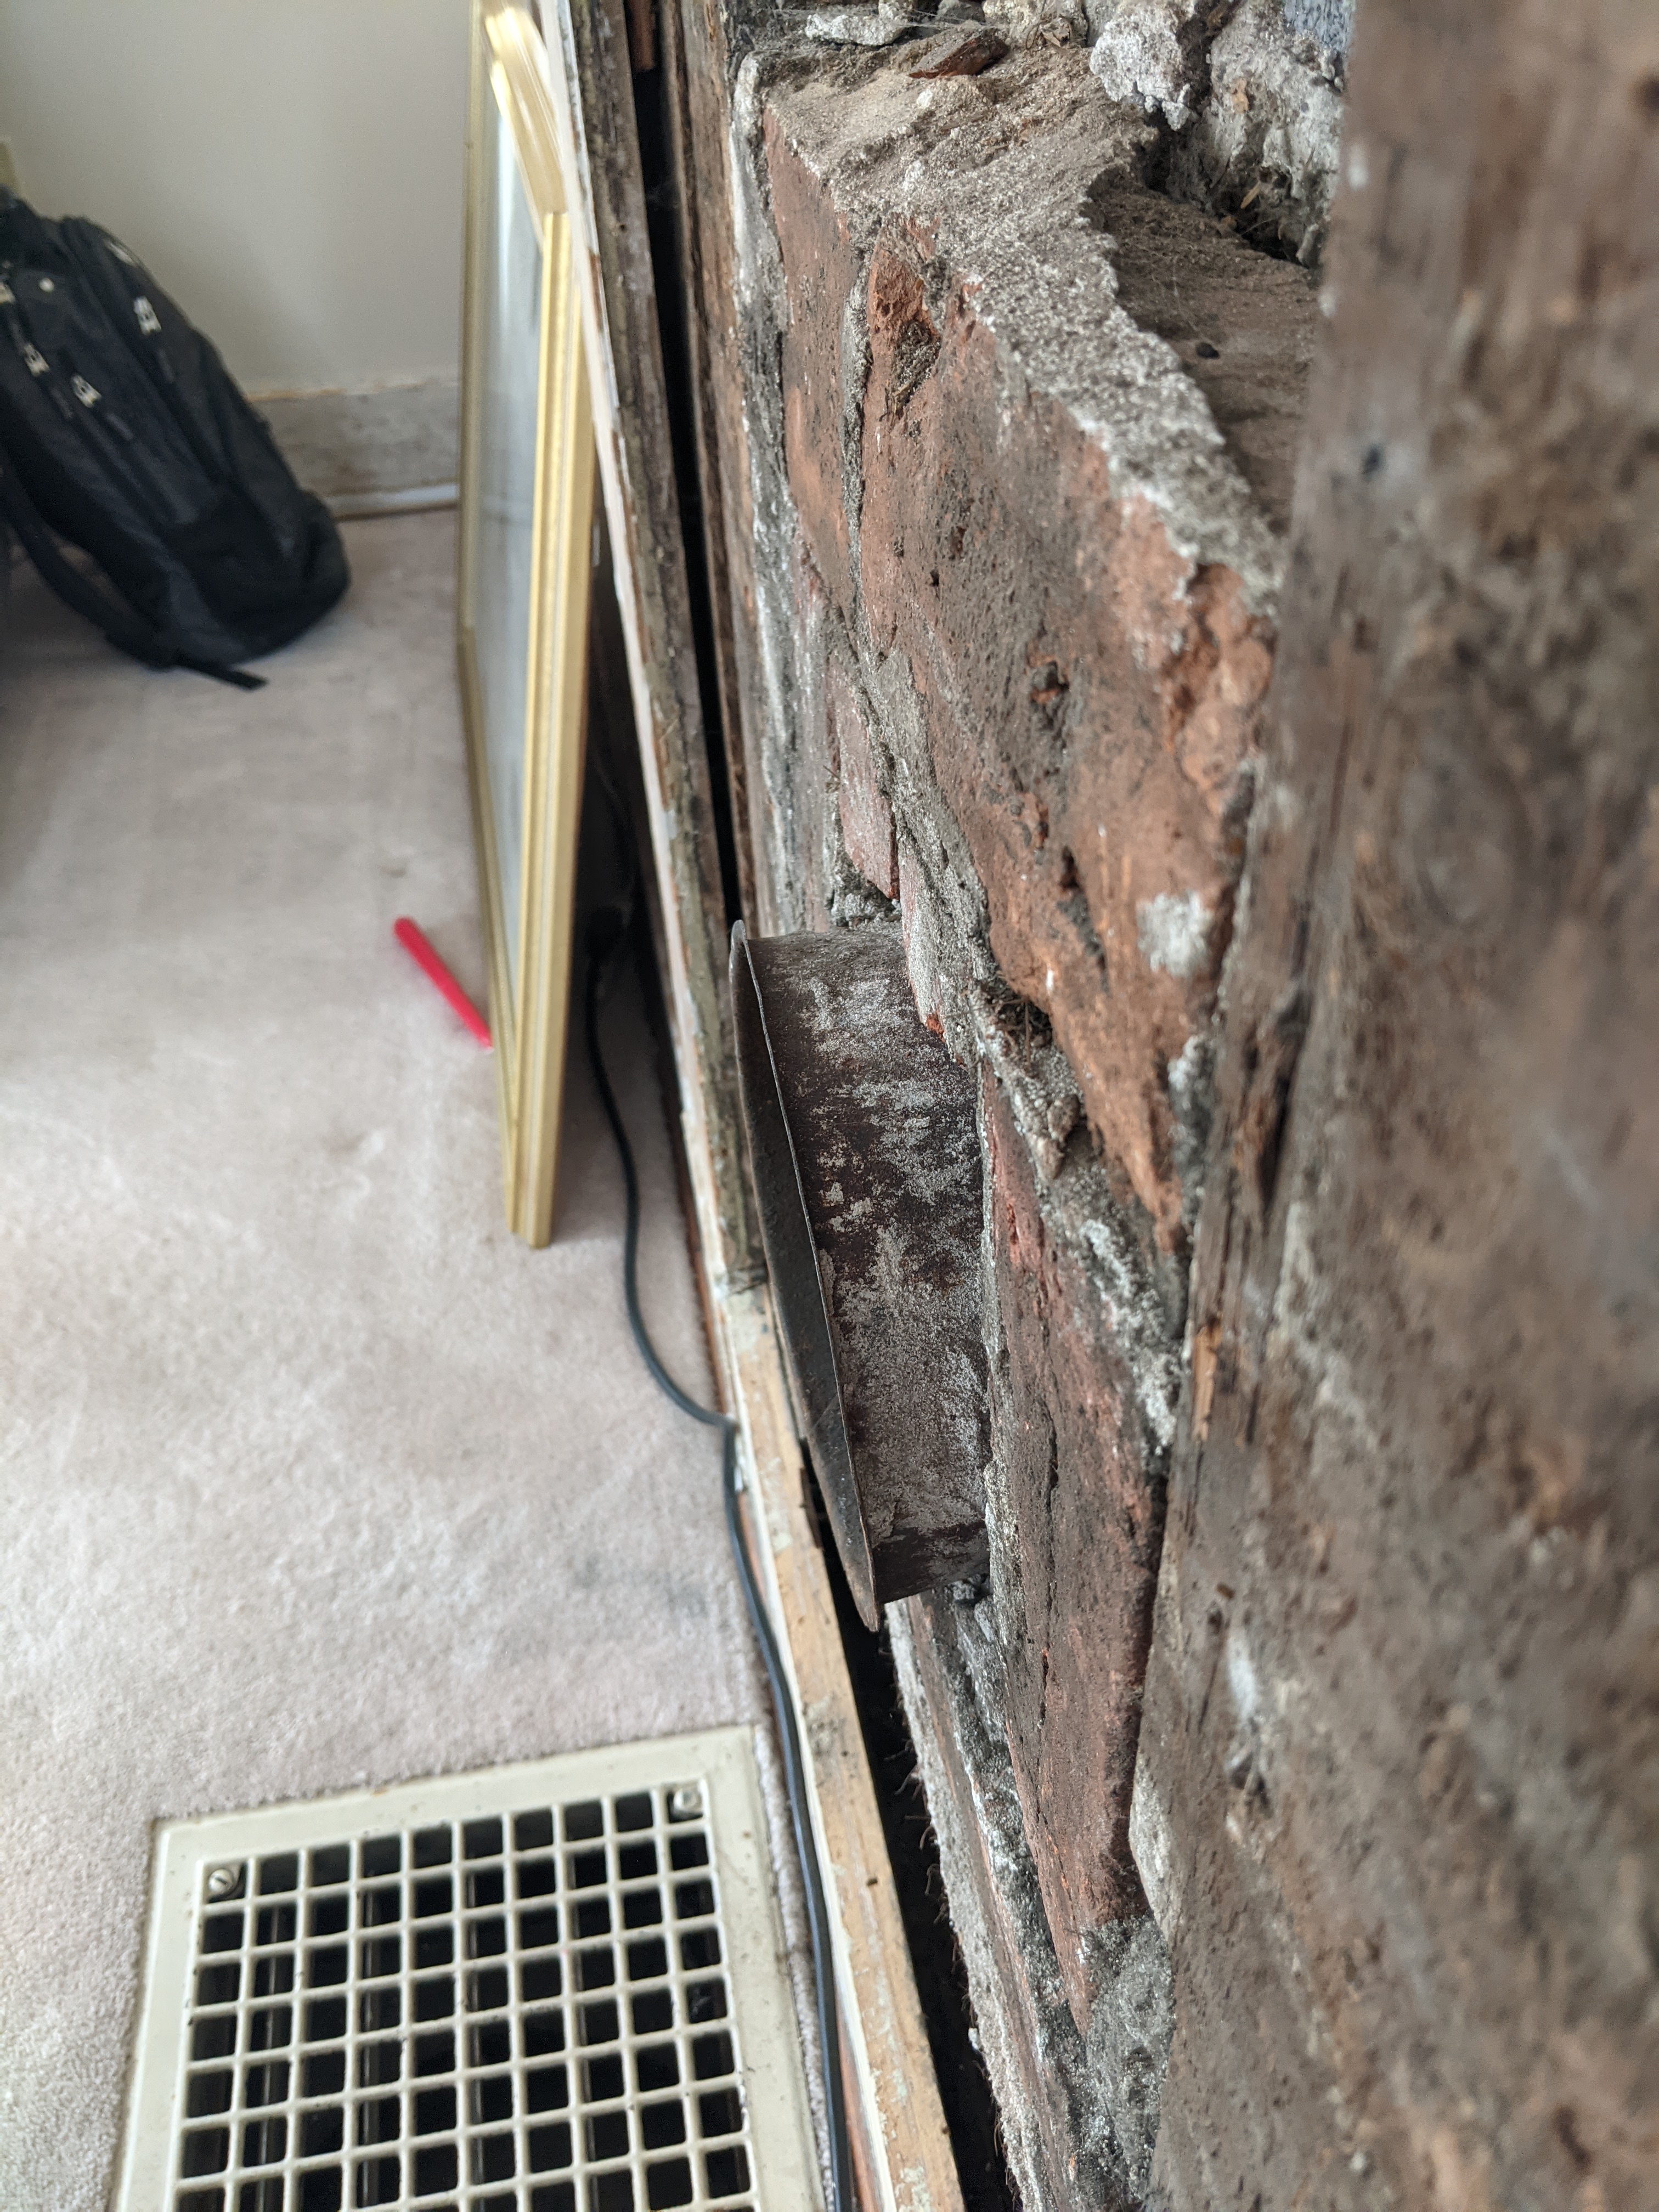
• I need to do some research about what it's going to take to re-parge the chimney that runs up through the back bedroom. This was actually the last thing on my list to do over the holidays, but honestly, I ran out of steam. There's a masonry supply store around the corner that could have some clues, but that means being out with people. I could pick up the phone, but dealing with not a little bit of anxiety/depression sometimes makes placing that phone call impossible.

Still trying to figure out what to do about this without creating a tremendous mess.
Something tells me that will be impossible.

• I got in the hardware to rehang the last closet door upstairs, but it's not sized exactly. I have a good idea of how to modify the mortises to accommodate the new hinges, but I don't want to mess it up. I think I need to put the door into the space, shim it up so it doesn't drag (it dragged terribly before) and mark where the hinges should fall. They are bigger than the old missing ones, so hopefully I can avoid the old stripped screw holes. Then I get to put the reversed latch back on.

Downstairs! (1st floor):
Welp. I'm working myself into a corner, where the last of the rooms aren't going to be "easy" or cheep.
Living room: Perhaps the easiest of the rooms left. I can't do much in there until I can open windows. While I'm toying with the idea of replacing the baseboard trim with new slab trim to match, the windows will need to be stripped to remove the blistering and alligatored paint, which means more hours with the heat gun, which means the type of ventilation that only open windows and fans can give me. I'll also investigate what the floor looks like under the carpet and either expose it, or eventually get it re-carpeted. The central light fixture should *probably* be replaced. It's been painted over, and 2 of the 3 pull chain lights don't function properly. (One only works if you screw and unscrew the bulb manually, one doesn't work at all.)
Dining room: Would be easiest to refinish, but at the very least I'm planning on trying to carve a window between the kitchen and dining room to get a little more light in there (short of opening up that wall completely.) Needs a little trim stripping particularly around the bathroom, but other than that, wash/prime/paint.
Kitchen: There's nothing easy about the kitchen, which by all rights should be gutted and reconfigured. It is highly likely I will not get to this room this year. The cabinets are in ok shape, and could be reused or painted, there's just precious few of them. Storage is a huge issue in the kitchen, and I'm not saying that in the way that everyone wants a 1k sqf kitchen these days, according to HGTV. I mean that in order to have canned goods and pots and pans storage I've taken an old tall bookshelf, slapped a curtain on it and called it a "pantry" in the dining room. I'm also considering dropping in a propane tank and converting the 80 year old range to a gas appliance from this century. I'm reluctant to do that before doing other work though, knowing how easy to fall into "good enough" and decades later you're still contesting with a kitchen that doesn't work for your needs.
Needs: new floor, little bit of trim stripped, prime/paint, new central light fixture.
Wants: Everything. The stove is in a terrible place. The space is used badly. I don't want to loose any windows because I watch the birds out the back and need light on that side of the house. It's a complicated space. I think I need a designer to really look at it to best determine how to most efficiently use the square footage. (Several thousand dollars.)
• Bathroom: I've had a few contractors come quote different levels of re-finishing the bathroom, and I can only laugh, and laugh, and laugh at the amount of money they want for what they claim they will do.
What should happen: it should be gutted.
What will likely happen: I'm going to strip everything, because every inch of paint is cracking and alligatoring. The walls that aren't tile are tongue and groove, and have been painted multiple colors. I don't mind keeping the green tile, actually - I think paired with a crisp white paint job, maybe with grey highlights to accent the vanity, it would look clean and calm. The ceiling is angled narrow tongue and groove. I go back and forth on just painting it, and framing in a flat drywall ceiling. This would serve to give space in order to put in a vent. Currently there is no ventilation in the bathroom, and the moisture it throws into the house every time I shower is an issue. I don't know if I'll get to this either, because it's bigger than me and I don't have the ability to throw money at this one, (which could be easily several thousand dollars.)
• Floors: I know the office, hallway, and dining room are narrow board hardwood. I suspect the living room is too, under the carpet. I don't know if I want to try refinishing them myself, as I think they will need color-correcting staining in areas to blend in shadows and fading. There's also an area in the dining room that needs replacement boards.
• Back door: The back door is fine, just needs a sand and paint. I'm thinking about attempting to replace two of the high interior panels with glass to get a little light into the room with the fridge and washer/dryer. I've seen it done, but that's a spring-time-outside-on-the-sawhorses project.

Those two little panels at the top? I want to make them glass.


Outside!
• I want to deal with the front step this year. It's a matter of throwing $ at it at this point to have someone haul a heavy flat rock to my house with a machine to put it in place. I'm sure it's worth every penny. I just need to save my pennies.
• I'm going to thin the woods near the front of the house. Most of the undergrowth is invasive crap anyway that will need to be squirted with a chemical to keep them from sending up more shrubby nonsense.
• I'm going to get in a load of topsoil and fill most of the front flowerbed which is full of poison ivy and largely shaded out.
• I need to keep thinning the hostas in the flowerbed near the backdoor. I might also reshape it a little to make mowing around it a little easier.
• I need to call Electric Guy Wayne and have him put in an outdoor electrical outlet.
• I'm going to see about replacing the exterior water faucet, or look into the packing. It's leaking unless it's shut off in the house.
• I'd like to reconstruct the little roof over the well into a trapdoor platform, and then put a little wishing well on top of it.
• Brush needs to be cleared from around the cesspool, and fill might need to be brought in to bolster that area up. I should really call the fire department and see if they can send someone out to tell me if there's anywhere on this property I can build a burn pile. Hauling stuff to the brush dump is no fun for anyone but me, and the hours are restrictive.
• I might rework my veggie beds into a different sort of garden near the backdoor. That's still in early thinking
• I need to keep clearing along the road, at least to the light pole. Sigh. Yay, poison ivy times!
• Someday, the "flower bed" in front of the house needs to be excavated and terraced. Right now it's  literal mat of poison ivy vines and flowers I can't tend because it's too steep. It's going to have to be done with some deftness because of how the house sits on top of the hill, where the well is, and where the cesspool is. I think that's going to need a landscaper or hardscaper to come in and give me a plan so I don't make more problems. (This will easily be several thousand dollars.)

Oh, and in the next few years, I need to put on a roof (several thousand dollars)

One bite at a time to eat the whale.

Monday, January 4, 2021

Wait - what did I do last year?

 Let's take a short gander down memory lane to 2020 - the year of eternal March.
There was (is) a pandemic, I didn't hardly drive at all (which is not like me), the times I was "social" where notable on my calendar, and there was an election no one can get away from, even now.

But what happened here?

• With Ian's help, the mudroom got tiled, studded and finished.
• The fridge and washer/dryer arrived
• I made the fancy coat racks and attached them to the walls with the power of annoyance and GRKs
• I ripped out weird shelves/chimney surrounds and patched and painted the back bedroom, (where I'm living for now.)
• I patched and painted the master bedroom, (where I hope to move soon.)
• I stripped, patched and painted the office.
• I got a bed for Windy's room, (not that she wanted one, but for other guests,) and actually set it up to look like a bedroom.
• I was sent home to work on March 13th for "A few weeks". (I don't know what "going back" looks like at this point.)
• Ian and Windy fixed the plaster in the upstairs hallway/stairwell. I painted it.
• I stripped out the old rug from the stairs and painted them
• I had the plumbing in the bathroom/mudroom redone.
• I put a new light fixture and new vanity in the bathroom.
• With the help of a lot of people, we discovered what the Mystery Pipe in the front yard was. (It was a bent up water shutoff valve.)
• Ian built me a beautiful clothesline that dries up to 4 loads at a time.
• My long suffering small engine guy dealt with the lawnmower for me.
• I had my friend Scott in to reconstruct the steps through the front wall.
• Ian put a beautiful new roof on the shed. I painted the windows.
• Because of the dumpster that was here for the roof, I cleaned up a badly overgrown area near the shed that had been used as a dump - Raked it out, grassed it over.
• I was able to put a few rocks back in the retaining wall near the shed. There's two big ones that still need to be put back though.
• I kept my job.
• I cut down and chipped up all the forcythia near the driveway.
• I planted some bulbs.
• I built some raised garden beds and grew a few veggies.
• I dug out, mulched over and back filled the big flower bed near the shed.

When I look at it this way.... I guess I did get a lot done.

Next post - What's on tap for this year? (Ohhh, exciting!)

A Happy New Year Hallway

Happy New Year!
I kept at the hallway, trying various stripping methods again. The chemical stripper had it drawbacks - namely that it was a lot of gooey, caustic work that didn't do all the paint layers at once. I'm all for gooey caustic work, but I only want to have to do it once. I found a piece of paper with the instructions on it at the end (naturally) and it even notes that it usually takes 2 applications, and that if you don't scrub all the stripper off perfectly, it will cause premature paint failure.
(She stares at the walls and thinks really positively.)
I reverted back to a heat gun.

*WARNING - DO NOT DO THIS - THIS IS A PRIME EXAMPLE OF DO AS I SAY, NOT AS I DO.*
The ONLY reason I went back to a heat method, and a largely unregulated one at that, is because there are no children in this house and there is only a terribly tiny chance of me becoming pregnant.
I DO NOT ENDORSE ANYONE USE THIS METHOD.
You'd remember that way back I had borrowed Ian's SpeedHeater but ditched that for chemicals. The SpeedHeater I was using was the original style - built for stripping siding. It was bulky and heavy and not particularly maneuverable. I made a tremendous mess with it, but it did work, and it's beauty was that it used a technology that never let the paint heat up too much. I decided to go with the Dumond PeelAway1 chemical stripper to try to make the mess a little more... contained. But that had a lot of drawbacks as mentioned above. Eventually I ran out of stripper, got out my cheep little heat gun (lighter, more precise) and went after the trim again. For the most part I found this to be the sweet spot. The BIG ISSUE with a heat gun is that it very easy to overheat the paint you are stripping and aerosolize the lead. I kept the heat at a level that would juuuuust get the paint to move, thus hopefully keeping the lead under that temperature.
There is a product that SpeedHeater makes called the "Cobra"- a smaller handheld device more akin to a heat gun. I'm told it's awesome, and looking at all the trim and doors that are left I might just bite the bullet and get one.

Anyway, I persevered and got the hallway done!

This is where we were. Chemical stripper everywhere.

This is where we got to - patched ceiling.

Already looking better - smoother anyway!

Chemical stripper only took the first few layers off. Heat gun got me down to what I think was the original olive green layer, which I was content with sanding a bit and painting over.

A good shot of the olive green, looking into the living room.


I needed light in order to deal with sanding the ceiling, so I put my tiny light on a clamp my Dad got me for Christmas and clamped it to the door frame. Thanks Dad!

I skipped stripping the trim around the door to the office. (I did sand it a little). It was fairly tight and there were no obvious big paint blisters that I could see.


Sanding. That black box on the wall is a cold-air intake for the furnace. I have changed the filters after I was done sanding - they were filthy.

These two little round scars were down on the baseboard. No idea what they were - maybe door bumpers for the closet.

It's really hard to get a good picture of the beaded trim. This little groove runs up the verticals on all the doors at the front of the hallway, but not on the back (toward the dining room).
This makes a great deal of sense - you'd put the pretty stuff up front where visitors would see it.

If I were to cut a cross section of the trim, it would look something like this, but the outside bead on the corner would be a little rounder.

Primed!
Oh hey... what about the door?

We'll just paint it to match!

Not that you can tell from this picture, but I painted the door to match the walls at the last minute. Cleaned it up nicely. For some reason I had never considered what to do with it when dealing with the rest of the space.

A few things - I'm not in love with this color (Ben Moore "Classic Grey"). It's really warm, and is scanning as beige in this space. It's not bad, it's just not... I dunno. It's not doing it for me. I had gotten a gallon of this color for the office, and didn't need nearly a gallon. Because I had so much, I decided to use it in the hallway too rather than buy more paint. It is the "pearl" finish - and it is way more shiny than is ideal in this hallway of ... character-full... horsehair plaster walls.
But it's clean and it's done.

What else have I been up to?
Let's go to the pictures, because I can't remember! (And this is why I take pictures of lots of things.)

Got that little door in the middle sanded, painted and rehung with cleaned or new hardware.
Pulled off the far right door after this picture and dragged it down to the basement for refinishing.

I'm putting liftoff hinges back on this so it matches everything else at this end of the house, so I had to fix the holes where a set surface hinges had been slapped on. Toothpicks and wood glue to the rescue!

The best tool I found to take off the toothpicks - bullnose nippers.

Got the last closet door downstairs and broke off the bottom of the handle trying to remove it.
Super bummer. Luckily Blake #1's aren't terribly rare, so I can replace it if I absolutely can't make it work.

This calls for a beer (that will give you a hangover if you're not careful and hydrated going in.)

OHH!! My back ordered doorknob washers and set screws came in!
Now I can fix all my wobbly knobs! (Doorknob washers are particularly difficult to get your hands on I've found. I got these through "House of Antique Hardware".)

A new washer (on top) and an old steel washer (bottom). The new ones are significantly thicker.

And then you think "Hey, let's try these keys that are supposed to work on 90% of doors!" and you find out these doors are the 10% of doors. Then you have to take the whole assembly apart  to try to get the key out.

I figured since it was apart, let's take the lock assembly apart to clean it and see what's going on in here that wouldn't allow the key to turn. Well, it's the wrong key. The little knob at the tip of my thumb is what was keeping me from being able to get it out.

My Mom got me beautiful curtains and rods for the office for Christmas, which I put up.

My sister gifted me a set of pretty lace curtains that I've put up in my bedroom, and spurred me to actually order the cellular shades for this room that I've been thinking about for the last 6 months.

That last closet door was stripped (left side) and then sanded smooth (right side).
Having an attachment for the sander to hook up to the shopvac has cut down on some of the dust.

All sanded and getting primed.

One thing you might have noticed way back at the beginning is that there's a closet in the first floor hall - a 4-panel door that matches almost all of the rest of the 1st floor doors. Later in the pictures it's been replaced with a curtain. I had pulled it off thinking I'd give it a light sand and a coat of paint and be done with it.
No. No, no.
These 4-panel doors will not make it to the basement for refinishing without something getting damaged (probably me). I had hauled it out to the driveway and put it up on sawhorses when I discovered that sanding alone wasn't going to cut it, and at least the front panel of this door would need to be stripped.
5.
Hours.
Later.
I got 90% of just the front of it stripped. It was cold out. I had not intended to be out there that long. I hadn't intended it to become A Thing. My feet were cramping and my shoulders and right arm were screaming at me. I had lost the daylight and it had started to snow lightly.
(This is why I'm looking at the SpeedHeater Cobra, because like Ian said "it would be hard to strip anything much slower.")
The weather is supposed to be good tomorrow, so I'm going to drag it back out and finish it up. Just a few more sections of paint to come off (hopefully less than 2 hours worth), a buzz with the sander (and the inset panels with some hand blocks) and hopefully I can get it back in and primed to get it up tomorrow or Wednesday. 

Due to HR vacation shinnanigans at work, I wound up having to take a bunch of time off or loose it at the end of last year/beginning of this year. I haven't had this much time off since I was unemployed almost 15 years ago - I might as well put it to good use if I'm not going anywhere exciting!

Monday, December 14, 2020

Another day, another length of trim to strip.

 I sat down and had a hard think about what was going to be next, now that the heavy lifting on the office is done. I settled on the hallway between the office/living room/dining room because it seemed I might have just enough stripper left to do what needed to be done. I'm going to need another bucket for the living room and all that window trim.
I have discovered that I'm getting faster with the stripping. Things that help - Schmear it on with a 4" putty knife, treat it like toxic frosting, pre-cut all your lengths of fancy Dumond paper and stage it ahead of time. I can't recommend that last one enough.

Looking towards the dining room.
The trim on the lower right is tight, so I'm just going to hit it with the sander and call it a day.

View from living room into the office (with stairs to the second floor on the left)
Here's where Big Wally's Plaster Magic had to happen on the ceiling. The plaster was a big flexible.
Other than tuning up the ceiling, there's remarkably little spackle work that needs to be done here.

Big Wally's and Stripping now takes time to set, so I worked on a few more things in between. One is finishing up closet door #1 of 2 in the upstairs hallway. I don't have any good before (or after, yet) photos for door #1, just a hole where it was before I took it off to the basement.

Door #1 (hole) and 2 that need to be finished,

Door #2. This poor door has seen some things.
The hinges are wrong, the latch is wrong, the handle latch isn't functional.

It might be hard to tell from this photo, put I want Door #2 to mimic door #3 - The bedroom door on the far left.

Here's where they cobbed on a piece of wood to get the Victorian era brass latch to catch. The gap that would have been easily spanned by the bar of the thumb latch was too big for this little brass latch.
Here we also see the handset for the thumb catch that is currently doing nothing more than being a handle.

This is what the exterior of the bedroom door looks like. In order to make it work with the orientation/door jambs, they used the thumb latch assembly backwards.

Back over here on the other side of the hall, in the closet, we see that the original hook is still on the inside of the door. I don't know why they didn't just flip it around like the other door.

Oh wait. This is why. The back hardware is gone. Removed, one would assume, so it didn't interfere with the door swing, now that it swings out instead of in. You don't want a door opening into the closet.

More evidence that it used to swing in - there's the old mortises on the inside (to the left).
Looks like they tried to move the lift off hinges, but the screws ripped out of this top set.
Going to have to fix this. The bright brass hinges you can see peaking through from the exterior of the door are not acceptable in a house that has zero bright brass hardware.

So the little closet door is in the basement drying (no action shots there) but tonight it will pobably get remounted.

That left me with the Mantle.
You might recall that a while back Ian and I ripped out the nonsense that was holding back the interior of the mantle. It was filthy and interesting. I had it covered up with a piece of paper for a while, but the tape started to give up and it would blow ever so gently in the breeze every time the heat kicked on.


I tore off the paper and leaned a leftover piece of bead board over the hole.
It wasn't quite big enough to cover the hole.
The cat also like the hot air vent.

This is what's back there. Old coal stove pipe with brick infill.
(cinder block modern furnace chimney behind)

Issue is the pipe protruded. Well. Let's solve that.

Got out my tin snips, collapsed the pipe and stuck a time capsule in there for whoever rips apart the wall in the future. Seemed appropriate.

Cut a piece of 5.5mm plywood to fit. It's not perfect, but.

This will at least keep the cat from stuffing her head in the filthy space, and also keep the heat from coming out of the vent and going right up into the wall.

Next up: Fishing the dang hallway because plastic drop cloths are slippery.

Monday, December 7, 2020

The End of the Office! (sort of)

 Since March I'd been working on the office. It became clear that working from home was going to be long-term, and I wanted a space to do it comfortably. Not one to do anything half measure, I started by moving my bedroom upstairs into one of the finished rooms, and starting to strip this one.
Stripping trim when it's old, crusty, chipping, 20+ coats of painted trim, is tedious, tiresome, and dirty. There's really no way around it. I tried all different methods - heat, infrared, and chemical. While I wanted to love the Speedheater (and it did do a fine job where I could reach easily) it just send paint chips everywhere when the paint cooled and got brittle. The unit, (built in truth to strip siding, which I'm sure it's very efficient at) was heavy and cumbersome to manipulate for me.

I eventually wound up using a method from the company Dumond called "PeelAway1". It's a two part stripper. You smoosh a liberal layer of paste onto the surface you want to strip, and then put the special paper over the top  and let it cook from anywhere from a couple of hours to overnight. Then you peel away the paper and the paste and a good bit of the paint comes with it if you persuade it with a metal putty knife. This system is their strongest commercially available - good for up to 30 coats. I usually had to do two coats with a little scraping and then a gentle sanding to even out the wood.

It took some getting used to, but at least there weren't paint chips flying everywhere. I had to be very liberal with the paste (.25" thick).  I couldn't do it in the blazing summer heat because not only would the sweat pour out of the rubber gloves and down my arms, the paste would start to run off the walls, stripping and discoloring everything in it's path.

I had tried to deal with it all summer, and just didn't get far. I finally took the days off before Thanksgiving, and that combined with this past weekend finally got it done except for some punch list things! But I have moved in my folding table and can work from here now. 

It began - working from home, pandemic-style, from the couch, with the cat firmly attached to my lap.

Before. That pealing paint was like that.
I cleared out the bedroom things and started. Infrared Speedheater heating in the foreground.
(It was nice to work with in the winter.)


Layers. It would chip, they would paint over it.
I found dark green, denim blue, yellow, mustard, off white and whites. Many layers.
The dark green and blue gave me the ideas for the color scheme it wound up being.

Window sill. When they slapped in the replacement windows, they just ripped therm out, and caulked the new ones into place.

Stripping.

Wainscotting over here is just grooved.

It also had things written on it under the paint. I never made it out.


My friend Misty painting during the Pandemic.
She made a print of her Plague Mouse for me.


Still at it with the Speedheater. Here I'd found where they'd filled in the gap between the top profiled trim and the bottom board trim with caulk. This was around April.

You can see where they'd just unloaded tubes of caulk in there.
I eventually filled the gap with backer rod and caulked just the edge.

You guessed it. Another gap due to caulk.

We were still working in here at that point.
I say "we" intentionally.
She loves a good Teams meeting.

Yup, done with the Speedheater. Got a sample pack to see what would work.
PeelAway1 was the clear winner.

This was around about July.

Hey, at least the windows were done.

Started throwing spackle on the walls too.
We all know how much I love spackle.

A short lesson in raking light and spackle:
Take a light source and go into the room you are dealing with in the dark. Place the light source (flashlight, cell phone) again the work surface so it rakes across. Note imperfections. In this case, a protruding drywall screw head.

Dimpled screw heads can mean iffy drywall. Here I've given it a friend for good luck.
Then you just spackle over the whole ball game.

You can use raking light to find other imperfections too, like tape lines and dings.

Here's PeelAway1 in action.

More spackle, more PeelAway.

I finally wised up and taped the plastic around the edge of the room, so that when the spent stripper inevitably slopped to the floor, I could just roll it up and toss it. It also stopped the stuff from creeping on to the wood floor.

All stripped, washed, and sanded! I didn't mess with the area around the outlet. I didn't want to provoke electricity in this project.

Drop cloths for paint!

Primer view A.

Primer view B

Ceiling and wall paint. Ceiling is Benjamin Moore "Muresco", the best dang ceiling paint ever, as far as I'm concerned. The walls are Benjamin Moore's Regal "Classic Gray" in a pearl finish.

AN IDEA! Because of course I have ideas in the middle of just wanting to get the darn project done.
Ian had made me some lovely wooden shelves years ago. Let's paint them to match, and get them a bead board back!

It's a box, right?
We're helping.

I chickened out.
I had intended to paint the trim in here "Van Dusen Blue", the same color as the master bedroom walls upstairs. But I talked myself out of it, thinking that much dark blue would be too much in this small room. I went with a lighter tone "Buxton Blue".
This isn't exactly the look I was going for - a little too Country Kitsch for me, but I'm in too deep ($) now.

Trim Paint view A. You can't tell the walls are gray unless you really look. In doing a little more research on this color, it's often used in situations where people want white walls that won't reflect surrounding colors.

View A - all cleaned up!

View B - Done!


I moved in my little folding table, all my computer crap, and my big rolling chair to discover that the floor is slightly pitched and now I spend much of my day trying not to roll away from my "desk". Good times. It's really nice to have a room to leave when work is done, (and now my living room looks huge!)

There's still punch list things to do for this space -
• Put a proper port in the floor where I had to drill a hole for the ethernet cable.
• refinish both doors
• Put up curtains and hardware
• Replace floor grates with something less rusty
• refinish the floor (someday. not for a while.)
• Get a real desk with a file folder drawer
• Get a floor lamp
• Hang some art

Next project - The hallway between the office and the living room.