Thursday, December 9, 2021

Sweeps!

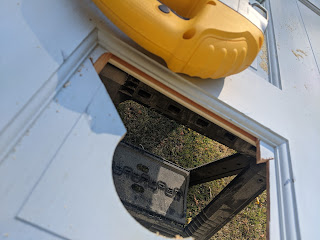
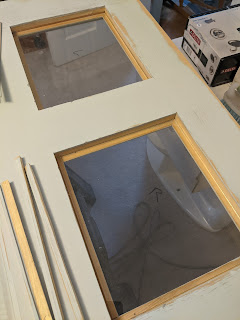
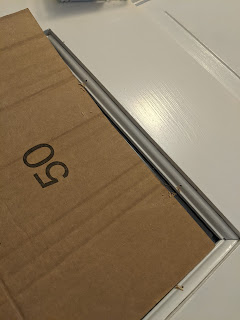
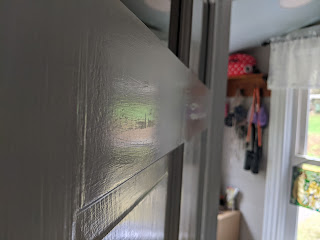
 In my continued effort to keep warm air in and cold air out, I managed to find unobtrusive door sweeps for both the kitchen door and the door going upstairs. I hated drilling into my freshly refinished doors, but it's a little better now, and I don't have to jam towels under the door except on the most bitter nights.

Kitchen Door - It looks like it belongs on there. I had to put it on the outside because that's where the nice straight threshold will touch.

No light coming through, which means no air coming through! (Or at least less.)

Sweep on the stairs door.

Well... it's... better. A smaller gap, anyway.

Next up in the air containment projects is extending the weird door trim for the stairs door. I've cut the piece to fit, complete with notched angle. I'm just waiting on the paint to dry.

The door closes against this. Why doesn't it go all the way up?

This is the gap at the top of the door when it's closed. I don't get why they didn't just run it up to the ceiling. It must have served some purpose at some point to have that gap there. It appears intentional.

The other thing I'm considering is changing out the hardware on the stairs door. When it was cover in 6 coats of paint, friction and gravity held it closed. The hinges were balanced such that after the half-way point it would swing close on it's own. While I managed to balance the hinges when I replaced them (GO ME!), not there's nothing keeping it closed. If the cat was more ambitious, she could flip it own with a paw. 

Decision time!

Do I want to keep the cute, inexpensive knob because it's pretty?

It's a glazed blue ceramic cabinet knob. Sorry about the bad picture.

Or do I want to install a new old-style latch, which I already own?

It would look sort of like this, as you head up the stairs. Because of how the door is put together, the thumb-latch part would have to go on the other side.


Tuesday, December 7, 2021

That time of year

Things have gotten a little crazy, what with holidays and work. If I'm posting once a month, I figure that's a good thing!
I have a 3 week vacation coming up over Xmass, so I'm hopeful to get a ton of things done. (Which should result in a ton of pictures!)
Of course, I'll be happy if I can even get 1/2 of that ton actually done.

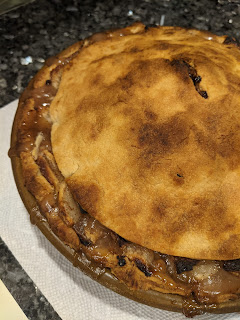
It's the pie time of year.
 

Let's see - what have I been up to? Stripping paint. Endless miles of trim. Last I left you, I'd ripped out most of the carpet in the living room, (pull the last out from under the TV stand last night), and started ripping out the baseboard. The intent was to take out all the baseboard and just replace it with new rather than trying to strip it, in an attempt to do something easier. After yanking out that bug damaged one, I decided that given all the rusty square nails holding them to the wall it would actually be easier to "just" strip it in place.

If you've missed previous updates, nothing about stripping paint is easy, FYI. Chemical strippers are messy and corrosive; heat stripping is dusty and slow. I can do about 5' of 6" wide trim in about 2 hours with the heat gun, more if they are loose pieces down on my workbench.

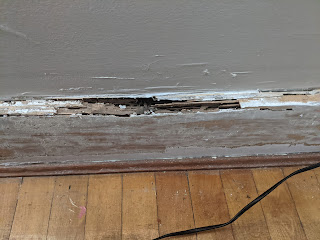
I pulled up the shoe molding from around the bottom of the baseboard and discovered there's really no insulation back there. These are the cavities that they would have shot full of expanding foam if I had opted for the "rim joist" insulation when MassSave did their thing. The issue with expanding foam insulation is that it essentially encases your wood timbers in plastic and nothing can breathe, so it just rots. This old house needs to be able to breathe, at least a little.
Finding the balance between it breathing and me freezing is the key.
I took the shoe molding down stairs and sanded it. (It had only been shellaced). I'll give it another light sand, maybe stain and re-shellac it. It's not in terrific condition, but it's salvageable without having to paint over it.
In terms of insulation, I'm investigating rock wool and wool-wool insulation, because I figure it's "pokeable" into the small gaps and holes without having to open up the whole walls. I REALLY don't want to have to open up these walls. It's just more work than I want right now. Spray foam would be easiest, but for the reasons I mentioned is right out.
My goal is to having the living room realtor-acceptable-grade by the end of my winter vacation, on 1/9. That doesn't sound difficult, but I have 20' of trim left to strip, the main door and the closet door to strip, the walls to fix, then every thing to sand, wash, prime and paint. I'm not even entertaining refinishing the floors right now. That might not be something I ever do. Maybe it will be my parting gift to the house when I move out some day, (floors are MUCH easier to do when you don't already live somewhere). We'll see.

In other news the Bathroom Guy, already so delayed this year due to supply and crew issues, has Covid. He sounds miserable. He's had to sit down the whole crew for a while, and was honest in that he's not sure what this is going to do to his schedule. Upon finding this out, and with the temps going down to below freezing at night I went to Lowes, burned some gift cards and got some tiny sheets of board insulation and a roll of mylar bubble insulation. I've covered the holes as best I can. I'm not keen on the idea of them pulling the roof (and re-shingling) the bathroom in winter in New England. I'm equally not as keen on exposing the one room with the majority of freezable pipes to the elements of winter in New England. Burst pipes are the last thing I need. So... Stay tuned. This does give me a little more time to think about tiles and things. Current plan is for him to still do the foundation work and the windows, and wait on the major bathroom gut until the weather turns better in the spring. Fingers crossed.

The bug-eaten baseboard is out!

The bug-eaten stud is not compromised! That damage is superficial.
And the sill area under this that was damaged has now been mostly fixed by Ian and Windy. There was a confluence of moisture and sap wood that allowed for bugs to get in, but both of those things have now been dealt with, (and a liberal amount of TimBor applied so it should never happen again.)

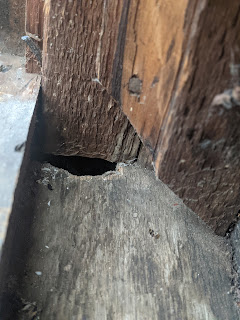
One of the mouse holes in the corner. Has now been stuffed full of copper mesh.

A wind brace hiding in the corner, along with snaked electrical that goes Lord Only Knows where.

It got cold, and the window trim in the living room had been doing a remarkable amount of insulating. Since the trim is going to go right back up over these areas, I taped the plastic to the wall and shrunk it on. The tape will pull the finish right off, but it will be covered up in this case. I'm warmer, for now.

Insulation Made-do. The silver does brighten the area up, even if I feel like I'm showering in some weird redneck space station.

This hole was big enough to require more structure, thus the board insulation.


This is the pattern. I tell myself that you eat an elephant one bite at a time. I'm trying to intersperse the long-haul projects with littler ones so that I have some quick wins to celebrate.
The furry roommate would like the take a moment to celebrate her new heated bed. Since I took out the carpet, the floors are quite cold, so I figured this was the least I could do for her.

Heated beds are the BEST.

(I'm going to live in blissful ignorance of my electric bill until it comes in. Hopefully with the dehumidifier running less, I won't notice it.)


Wednesday, November 3, 2021

Surprise! Hole in the wall!

 Working on the living room, and decided to see how far the insect damage went. Rather than strip the trim, I'd resolved to just replace it. It's true 1" x 6.5" base board boards - nothing fancy - no molding, just a slight bevel at the top that isn't noticeable unless you're me. So I got out the tools and gave it a go.

The damage. This had been full of caulk until I hit it with heat and it turned to bubble gum on my scraper. It's been a while since I addressed this. Most of the wood in this section was hollow flakes between the chewed out cells.

I blew through the hollow section, yanked part of the board, and found what I'd suspected - The trim is original, and there had been plaster above (bits of plaster keys remained in the wall.) They replaced the plaster with drywall at some point, but didn't pull the trim and run the drywall behind it - they just stacked the drywall on top of the base board. And it seems like super thin drywall.


This base board is held on with square spikes - very rusty spikes. This stuff does not want to come off. It's not going to be as simple as "pull of old, insert new". It's going to be a challenge on how to fix the walls. Do I extend the drywall down? That would certainly make the room warmer, but it's going to add time I didn't factor in.

In other news, Bathroom Guy called - I'm #2 on his list, and he should be by to measure the living room windows at some point this week. (So exciting!)

Monday, November 1, 2021

Weekend trials

It started out with a vacation day, that then turned into only 80% of a vacation day, when a meeting got scheduled that I couldn't miss. Then it rolled into an order I placed online for materials to insulate my bee hives, only to show up to find out they let me order something they didn't have in stock. Then lots of driving, and getting really nothing accomplished with my vacation day, a day so precious to me because I don't get to dictate how my time is spend 5 days a week. The paycheck dictates how that time is spent.

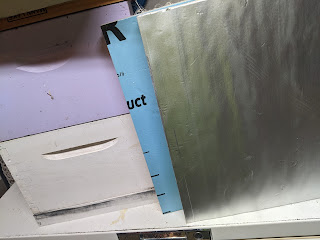
But I got home to the  folk's, and after cooling off and eating dinner, Mom helped me construct some bee cosies. Or Bee-glos, if you will. Using nothing but 2" insulation board and a roll of Zip flashing tape, we came up with 4 snuggies for the bees for the winter.

A mock hive I built in the basement to test fit everything, and some of the board used for insulation.
The stuff is great (R13!) but is embedded with fiberglass, which made it a pain to work with.

Our stack of completed bee cosies, waiting to go on the hives. The fronts swing open so I can slip them over the backs and then duct tape it shut.
It was too wet for me to do this past weekend. Fingers crossed for this week.

Sunday dawned bight and cheerful. Which was nice, but unexpected. I thought it was going to rain all day like Saturday, and had so planned to work on one of Ian's windows in the basement. If the sun was going to be out, there was no way I was spending all day in the basement. After cleaning and tidying, the cat barfing on the carpet for the 43rd billion time, and finding a mummified snake behind the couch in a moth glue trap*, I thought, you know what? It's time for this living room carpet to go. I need to know what is going on in here and how things are getting in.

*Yup, you read that right. Loud words were said. A lot. For a while. Snakes can live in the basement in the winter, they can live in the yard all year round, but they Can Not live in my living space. A very distinct line has been crossed and interlopers will not be tolerated. I have to refinish this room to get rid of any access points.

I get it. Carpets are warmer. They deaden sound.
But I just can't get around having covered up this.

I have to cut it out in strips - Move some stuff, then cut out more strips. Everything could come out but the couch. Not sure how I'd ever manage getting the floor refinished, though I'd really like to. Hrm.

They aren't in the worst, or best shape. The carpet padding was disintegrating, and particles in it had started to melt and adhere to the floor. This had happened to a lesser extent in the office. Some of it
scrubbed off.

This image is very kind, and where I stopped for the night. I had to cut out a notch for the floor register (10x14") so it would sit down properly.

Here's a shot of the odd wear/fading and finish/carpet padding buildup.

They do clean up pretty nicely. I almost wonder if I sanded them lightly with the orbital and hit it with some oil if it would work. It feels like hard maple.

Nice bonus is that I get back almost an inch of vertical space! You don't think an inch is much, but it does feel like it makes a difference.

One of two access points. This is the gap between the floor and wall trim. It was behind that hard to see trim in the foreground.. and much of it had been stuffed with rope caulk.

The more likely access point. Ancient insect damage that comes right up from the sill into the trim. Once upon a time it had been filled with caulk until I started stripping it. Now it's just all going to get removed and replaced.

I'm about 2/3 done removing the carpet. And I know that I'm doing this backwards - I should have fixed and painted the walls and ceiling first while the carpet that I didn't care about was down. But I needed to do something that was immediate, apparent, and felt like a victory. Revealing this floor ticked those boxes, and allowed me to do something that wasn't in the dark basement.

Monday, October 25, 2021

An October Surprise

Have you ever looked at a recipe and thought to yourself, "That sounds delicious, but it uses 68 different ingredients; I only have 35 of them, and would have to drive to a specialty store to find at least a dozen others, so... never mind."

That is how I felt about the latest project. I knew I was going to have to use ALL of the tools, which meant humping them up from the basement. I knew there was no way I was getting the back door down (and then up) from the basement, what with the bathroom door still in the way down there.

I'd gotten used to being able to leave the back door open this past summer though, and as a result, I got used to the light in the laundry/fridge room. I had an idea in my head to fix this, but dragged my feet, because like I mentioned, it was going to take ALL of the tools.

This past weekend all the stars lined up. My latest window was on it's way to NY so Ian could make sure it fit. (It did!)

The leaded side is fixed. The other side swings in as far as I know.
There's two windows with this setup, so I have to make 1 more fixed at this size and then 2 slightly smaller for the swinging side.

I'd removed trim from a 2nd window in the living room, but I wasn't in any hurry to spend what might be the last beautiful day of the fall in the basement. I decided it was time to tackle the back door.
There's projects that you do, and you get 95% of the way there, and then for whatever reason it stalls. I'm sort of there right now with the chimney upstairs - I'm going to put a skim coat of joint compound on it, but I need to wait for the InsulStick to really, truly cure. I was there on the stair way for a long time, unable to get the railing up (it's up now!). That is the deal with this door - I redid the back porch/mudroom a long while ago now, and it looks great. but I left the door, because at the time it was so cold out I didn't want to take it off to refinish it.

Saturday was a the day.

Before (from the inside). The whole room used to be painted this dirty light blue color.
It didn't clash too badly with the new paint color, so I let it go. But it had to be updated.


Like I said - all the tools. Drill with hole saw, jigsaw, orbital sander. Manual sanders. What a circus.

Just a note - I hate the hole saw. It's great at what it does, but sometimes if you force it ever so slightly, the blade stops dead and rips the drill out of your hands.

Luckily, there were only two holes to be made.

Very Carefully cut two parallel diagonal cuts to the corners, being Very Careful not to hit the molded edge.
At this point, I still didn't know if this was a floating panel door. If it was glued together, I was going to be... in for a very long project.

The clouds parted, and the panels fell out - It wasn't glued!

At this point I had an idea. If I could very carefully score the molding and cut it away from the door, I could reuse it when I put the glass in. Time for a fresh box cutter blade.

SUCCESS! Then remember to label all the little fiddly bits.
The funniest ones are labeled "Inside Left Left" and Inside Right Right"
(As seen from the inside, left panel, left side)

At this point, I sanded the crap out of the door. No pictures, but you can imagine the dust flying. It's why I wanted to make sure I did it outside if I could. It didn't need to be stripped (it's not that old); only maybe 2 other coats of paint on it. Thank goodness. I have 3.5 more full sized doors to strip, and it's just not a good time. At this point I dragged the door into the dining room.
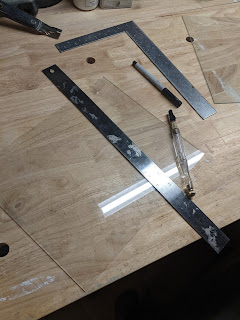
I measured and cut the glass out of some old heavy-weight glass someone had given me that came out of an old curio cabinet. I can't use this significantly thicker stuff for the leaded windows, but for this it was perfect.

Photographing clear glass stinks. But trust me, when I dry-fit the glass in there, it fit.


After cutting the glass, I primed and panted both sides of the door. In this case I used PGG Gripper primer and Benjamin Moore "Advanced" Super White High Gloss (to match the rest of the painted doors and trim.) Gripper works fine for inside projects, and Advanced is great but for 2 things -
1) it has a Very Short Workability Window. It works like oil paint (which it is intended to replace) So you lay it down and move on. There's no touching it up or you're gong to lift the paint and it will look overworked. It is self-leveling on a horizontal surface, which is nice, and when left alone to cure out completely, it's a great finish. However, that cure time?
2) 6 hours to dry-to-the-touch, but can be days before it's fully cured, during which time you can easily leave dings, imprints, smudges, and palm prints. I know this, and I STILL mass up the surface because I get impatient, and it feels dry.
Anyway, at this point I'm done priming and painting.

All of my Sarco window glazing putty is dried out and full of goobers, so I made do with the black stained glass cement. It's not that this needs to be weatherproof, I just didn't want the glass to eventually rattle the door. It's sort of the same thing - an oil base with calcium powder, and in this case, colorant. Smooshed in a super-thin bed of putty and placed the glass.

I used push points for this one. Normally I use old-fashioned triangle points, but the weight of the glass + this being the primary door made me think that these more robust points were the way to go.

I placed the painted trim bits back in, and drilled pilot holes. There was no way I was going to get to this point and screw it up by not drilling pilot holes and splitting the tiny pieces of wood. Cardboard to make me feel better about being that close to glass with a drill and then a hammer.

Tapped in the tiny little finish nails with my tiny little carpet tack hammer. This was so nerve wracking. Thought about going and getting the nail set and really burying them, but then I got to thinking- they aren't obtrusive, and if (God Forbid) I ever have to get back under there, I'm going to need something for the needle nose pliers to grab onto. I'm going to leave them just a little proud of the surface.


This is the finish issue I mentioned earlier. It's hard to see in the photo (and in real life if the light isn't right) but you can see where I flipped the door over too soon to work on the other side. Even though I had cardboard and wax paper down to pad it, it still left a mark in the polish. I don't know if it's enough to warrant me going back and trying to brush another coat over this area.

As you can tell from the above picture, there was door hanging. But not before there was hinge shinnanigans. I wanted roil rubbed (or black) hinges to match the rest of the door hardware. and $10 wasn't a huge deal to replace the painted over bright brass ones. Off to Koopman's I went, got the 3.5" black hinges with the correct radius corners, can home and opened the package only to discover that they were all fixed. Meaning, I couldn't take the pin out. Meaning, as a person working alone there's no way on this green marble I was going to be able to mount the door myself. So I went to Lowe's. All of their hinges were fixed too. So I wound up at Home Depot, where thankfully they still stocked black, 3.5, "loose" hinges.

I got the fancy no-squeek ones.

And the door went up! With only a little fussing!

Inside facing out.

Open!


I really could not, in my wildest dreams, expect this project to go so well. To the point where I didn't want to talk about it, lest I jink it. The only thing that wasn't 100% was that stupid finish issue, and I'll probably be the only one who ever notices it. The panels came out like they wanted to. The glass mounted in like it was it's mission in life. The hardware all went back on with no fight. It cleaned up beautifully.
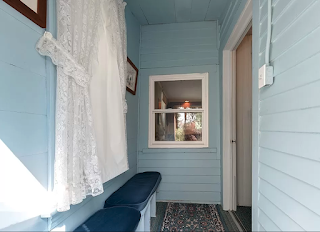
Before, from the original listing photos

After - lived in (obviously not staged), but I think nicer.