Well, I've accomplished one big thing already this year that has nothing to do with the house.
I took "advantage" of perhaps the worst possible market in memory to trade in a car, and traded in the '14, 60k miles Forester "Touring" Turbo.
Meet the new CRV. It's a '16, has 140k miles, 4 cylinder, takes normal gas and doesn't need fancy maintenance. I didn't realize how much I'd gotten used to sheer power of the flat 6 Boxer engine. It's like going back to driving a lawnmower. But it's a cheaper ride in the long run, I hope.
 |
| I just hope this car treats me as well as my first CRV did. |
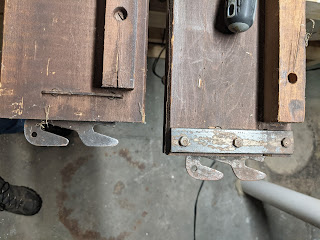
I also started a project for me. I've needed a full sized bed frame for a while, but nothing I found was sized proportionally for my house or priced right for my budget. Then I stumbled over a listing for a free bed - someone had started to refinish it but then ran out of time and ambition. I contacted the woman, and picked it up last Saturday. It looked fine from the onset, but...
 |
| The foot board. Decent original condition. Some scratches commensurate with age. Appears to be mahogany veneer. |
 |
| Ah. The head board is where the former owner started her refinish. With an orbital sander with a very aggressive grit. So many swirls. |
 |
| Well, let's take this down. Time to get the hardware off, like those casters. |
 |
| Taking off the finish - it was just barely kissed with shellac, I think. I started lightly with a 120 grit, and it was more than enough. I took it down to 320. |
 |
| The bed's composition is mahogany veneer on a poplar frame. This isn't a great picture, but the green staining in the grain sort of gives it away. |
 |
| I hit all the pieces with a wood conditioner to make it take the stain more evenly. I was half-temped to just leave it natural/conditioned, but then it would look very patch-work-y. |
*NOTE: Don't do staining projects inside in the winter unless you have some sort of exhaust system if you don't have to. It Stinks. A lot. While the respirator made me blissfully unaware of this while I was in the basement, when I went upstairs I was fully aware of my mistake.*
I have a number of different top-coat options. I have 2 quarts of Shellac I could use (glossy end result). Since this is not a high-abuse piece, I could probably do a few coats of that and it would be fine. Down site is that it scratches pretty easily. I also have a quart of a water-borne "Old Masters" clear finish that's intended for outside projects that would probably be fine (satin end result). I'm guessing highly scrtch resistant. I also have some random poly finishes downstairs, but not a lot of any of them.
I think I'm learning toward a satin finish so that it looks more natural-wood-like, but I'm not so invested in the natural-wood-look that I want to fuss with an oil finish.
I'd like to get this done and under my bed sometime in the near future.
We'll see where I wind up after my trip to Koopman's for new bolts this afternoon.
And if I hate it, I can always paint it again.
 |
| According to my files, these are only 12 weeks away! |


No comments:
Post a Comment