July 1st. The days are still blurry. I'm still employed. The virus is still a thing even if some people want to wish it out of happening.
(FYI - Not going to happen. The virus believes in you, even if you don't believe in it.)
I don't feel like I've gotten a tone of work done since Scott did the wall. The flowers have been growing, the woodchuck has been mowing them down, I put up an electric fence to keep him out of the garden, and the veggies are growing well.
We had a socially-distanced dinner for 2 of Ian's colleagues on Monday, for a total of 5 of us. Frankly, that's as many people as I want to share space with right now. I sort of grilled them about their pandemic habits, and still wiped the place down with disinfectant afterwards, just in case.
Ian and Windy have been working their tails off fixing the plaster for me in the upstairs hallway as a thank you for living here while on a local job. The area was kind of a cobbed mess - horsehair, drywall, a smidge of paneling, and some really bad former repairs.
 |
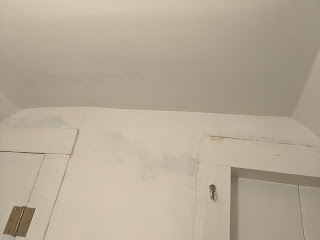
| The door is neat and all, but you see the flaking plaster in the upper right? |
 |
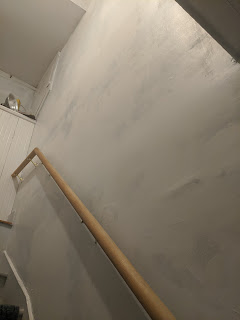
The stairwell, with it's bulges and chips in the plaster.
This picture is very kind to that area, actually. |
 |
| More chipping. |
 |
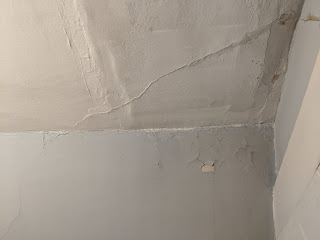
| This whole section of roof was sort of saggy where the keys in the plaster had let go. |
 |
| One end of the terrible.partly-cement repair. |
 |
The whole terrible partly-cement repair.
Best we can figure, there was a water leak and the plaster came down.
They "fixed" it with a very hard plaster, probably mixed with Portland cement.
Then they replaced the chimney that is right behind that wall, knocking the smashed bricks
into the attic, which, when Ian removed the terrible cement repair, rained down on his head from above the lathe. |
 |
| The big bulge under the water leak, due to the house moving and settling. The pressure forces the plaster out. |
They came in with
Big Wally's Plaster Magic (and it really is). All the plaster is reset, and nothing is loose and smooshy anymore. How it works is - You drill a hole through the plaster into the lath, squirt some conditioner in there (very important for adhesion), let that sit for a few, then squirt in a special adhesive with a caulk gun. Screw those washers into the little holes you've made and let it set up really good, acting like a clamp.
 |
| It's like art or something. |
 |
| I helped! I did this tiny section. |
 |
| Clamps, clamps, clamps. |
Once it's set up, you come back and remove all the washers and screws. The adhesive will have done it job. No more jiggles!
Then they started on the fixes -
 |
| Goodbye, terrible patch and bulge, hello drywall repair. |
And now we're at a point of final touch up and primer -
 |
| You can barely tell terrible repair was ever there unless you know to look for it. |
 |
| This was a super-saggy slope. It's so much better already. |
 |
Closeup of the super saggy slope.
It was *covered* in Big Wally washers to suck it up. |
 |
The stairwell - It will always have some plaster waves, because it's still plaster.
But it's not falling down! |
 |
| I can't even tell that this is where the insulation guys blew a hole in the wall last year! |
(Before)
There's a few little tweaks left, and then I need to pick out a color paint for the hall. It can't be too dark, because there's relatively little natural light, especially at one end. I need to keep the doors closed to most of the rooms up here to keep the cat out of them, so it reduces the light enough where it's going to be kind of a trick. I'm thinking White ceiling, SuperWhite Gloss trim, and perhaps a light grey with blue undertones. I'm not sold on it though.
Then I need to pull off the last two doors and refinish them/their trim/their hardware. But! I don't have to do two of the bedroom doors because they are a lovely stain/varnish. I'm just leaving them well enough alone.
Also, I got in my Big Bucket of Dumond 30 Coat Stripper, so I know what I'll be doing with my free time for a while...


No comments:
Post a Comment