Showing posts with label Paint. Show all posts

Wednesday, July 1, 2020

And here we are -

July 1st. The days are still blurry. I'm still employed. The virus is still a thing even if some people want to wish it out of happening.
(FYI - Not going to happen. The virus believes in you, even if you don't believe in it.)

I don't feel like I've gotten a tone of work done since Scott did the wall. The flowers have been growing, the woodchuck has been mowing them down, I put up an electric fence to keep him out of the garden, and the veggies are growing well.
We had a socially-distanced dinner for 2 of Ian's colleagues on Monday, for a total of 5 of us. Frankly, that's as many people as I want to share space with right now. I sort of grilled them about their pandemic habits, and still wiped the place down with disinfectant afterwards, just in case.
Ian and Windy have been working their tails off fixing the plaster for me in the upstairs hallway as a thank you for living here while on a local job. The area was kind of a cobbed mess - horsehair, drywall, a smidge of paneling, and some really bad former repairs.

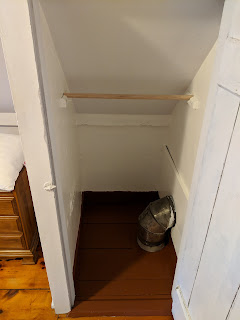
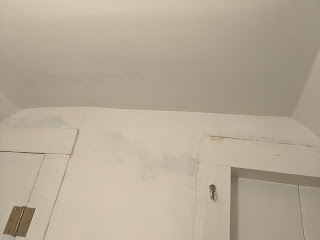
The door is neat and all, but you see the flaking plaster in the upper right?

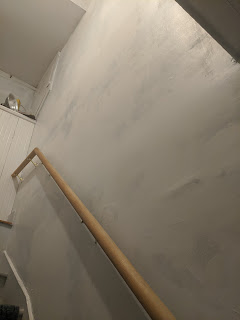
The stairwell, with it's bulges and chips in the plaster.
This picture is very kind to that area, actually.

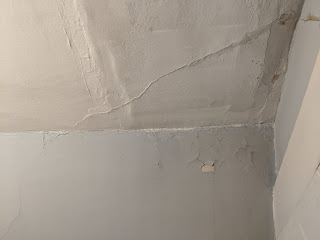
More chipping.

This whole section of roof was sort of saggy where the keys in the plaster had let go.

One end of the terrible.partly-cement repair.

The whole terrible partly-cement repair.
Best we can figure, there was a water leak and the plaster came down.
They "fixed" it with a very hard plaster, probably mixed with Portland cement.
Then they replaced the chimney that is right behind that wall, knocking the smashed bricks
into the attic, which, when Ian removed the terrible cement repair, rained down on his head from above the lathe.

The big bulge under the water leak, due to the house moving and settling. The pressure forces the plaster out.

They came in with Big Wally's Plaster Magic (and it really is). All the plaster is reset, and nothing is loose and smooshy anymore. How it works is - You drill a hole through the plaster into the lath, squirt some conditioner in there (very important for adhesion), let that sit for a few, then squirt in a special adhesive with a caulk gun. Screw those washers into the little holes you've made and let it set up really good, acting like a clamp.
It's like art or something.

I helped! I did this tiny section.

Clamps, clamps, clamps.


Once it's set up, you come back and remove all the washers and screws. The adhesive will have done it job. No more jiggles!

Then they started on the fixes -
Goodbye, terrible patch and bulge, hello drywall repair.

And now we're at a point of final touch up and primer -
You can barely tell terrible repair was ever there unless you know to look for it.

This was a super-saggy slope. It's so much better already.

Closeup of the super saggy slope.
It was *covered* in Big Wally washers to suck it up.

The stairwell - It will always have some plaster waves, because it's still plaster.
But it's not falling down!

I can't even tell that this is where the insulation guys blew a hole in the wall last year!

(Before)

There's a few little tweaks left, and then I need to pick out a color paint for the hall. It can't be too dark, because there's relatively little natural light, especially at one end. I need to keep the doors closed to most of the rooms up here to keep the cat out of them, so it reduces the light enough where it's going to be kind of a trick. I'm thinking White ceiling, SuperWhite Gloss trim, and perhaps a light grey with blue undertones. I'm not sold on it though.
Then I need to pull off the last two doors and refinish them/their trim/their hardware. But! I don't have to do two of the bedroom doors because they are a lovely stain/varnish. I'm just leaving them well enough alone.

Also, I got in my Big Bucket of Dumond 30 Coat Stripper, so I know what I'll be doing with my free time for a while...

Monday, September 16, 2019

The mold has been mitigated, and the bulkhead painted.

Tuesday I took a day off from work because the Mold Men were coming!
Puroclean sent a two-man crew out and one of them spent a good 5 hours up in that cramped filthy hot attic crawlspace documenting and cleaning. There's no action shots, but they did send me a nice document with some before and after pictures.
The top is before cleaning, the bottom is after.
The profusion of roofing nails made it difficult to get super detailed.
I plied them with gallons of water and a bag of potato chips when they were done. After the bill was taken care of, I had what I'd been waiting for.
(They really need to take my check and get their printer heads cleaned.)
While the nice men were dealing with the issues in my attic, I couldn't just hang out and do nothing. I also didn't want to be underfoot, so I went outside and started cleaning up a flower bed in a funny cement planter that needs to go. I figured I could empty it and back fill it with gravel to create a pad for a generator. I got out all the yard tools and started wacking away at it when I discovered the most curious thing.
Crocuses. In September.
Before

After

Crocus. Actually not a true crocus, but a "Naked Lady"
Autumn Crocus, which is a member of the lily family.
Well. I couldn't be killing these lovely little flowers trying to move them right now, so I had to find something else to do.
I was standing right next to the bulkhead, as seen in the right of the before and after photos.
The kind of rough, a little rusty, in-need-of-love bulkhead doors...

Ok. New plan. Paint the bulkhead.

Scrubbed.

Before. I didn't want the little rust to become big rust.

I love my palm sander. Once of my best purchases.
Took it from course up to fine , paying special attention to the rusty spots.

First coat of white Ben Moore Direct To Metal paint. I remain skeptical.
I had to drill out the handle.

First coat. I rolled it, and it's kind of patchy. I'm not a fan of this whole "Paint + Primer" trend.
I just wind up putting on multiple coats anyway.

Coat number 2 drying a few days later.

After a number of hours of dry time, I through the plastic over it while I went to VT and it was supposed to pour.

New handles! So much cleaner!
Such a crappy picture, making it look like it glows!
(It doesn't glow.)


So that was a nice little project to get out of the way. I have to deal with the poorly painted and pealing flashing above it, but the doors are in better shape now.
Next up will be the front door.
I'm anxious. But it will be ok.


Perky.

Monday, August 19, 2019

Busy weekend of sheds and walls

I finally was able to complete the shed door this past weekend. It took about 8 hours over the course of the week, dodging rain drops, and making trips to the store for things I needed. But it's done -
Patch applied, I think this was post sanding.
Worked up from 60-120 grit, wiped it down with a tack cloth.

First coat of primer. I wound up putting on 2 coats to smooth it out.

First coat of paint. It was a lot more blue than I thought.

Final - 2 coats of paint and an overnight dry dulled it down a bit.
I need to pick up some black Rustolium in a can for the hardware, but other than that it's done!
Next - the roof.
In between the rounds of work on the shed, I decided to deal with the basement stairwell. First, because the mosquitos in town now carry EEE, so I can't be outside in the evening unless I'm dosed with bug spray. Second, because even though the dehumidifier makes the basement warm, it's dry, and feels nicer. Third, all the stuff hanging on the wall right at the top bugged me.
Plus, I could practice spackle in a place where it doesn't really matter.
Before cleaning and removing a rail. Dual rails are great, but it make the stairwell really narrow.
I will store it so that in the future if it's a code issue, I can slap it back up.

Post TSP scrub and rail removal.
Just scrubbing the left wall made a huge difference.

Patches patched. Some were pretty deep, so I am going to let it dry
for a good 24 hours before smooshing on another coat.
One downside to dating a historic preservationist, (hi Honey!) is that you pick up things by the very virtue of being at trade get-togethers and having evening conversations. He's a professional, and I mean well. I know there's right ways and wrong ways of doing things, and in the case of this basement wall, it probably should be stabilized with plaster washers and injected adhesives and all sorts of things. Pricey things. I know this. But... forgive me... I just want it to not have lath showing, so I'm smooshing spackle and fiberglass tape over the worst of it and smoothing it out (sort of.) The worst part is right over the light switch, which you can't see very well in the pictures, but at least it's not a gaping hole anymore. The patch might fall out in a year, but until then, for a basement stairwell, it will be good enough. Rather than tape and fill the corners, I think I'm just going to get some 1/4 round molding to cover the gaps. I think electrical runs around behind there, so I don't want to make it super difficult to get at.
Stay tuned for the continuing adventures in basement stairwells!

Some Pig.

Monday, March 25, 2019

Vindicated

I know everyone's probably bored to tears hearing me wax on and on about paint color choices. Especially about how very disappointed I was with "Fresh Cotton", aka Warm White. Most people would have been able to shake it off, laugh, and go get a new paint color. But this got under my skin and really bugged me. I could see it in my head, and it worked, so why wasn't it working in real life?
In real life I'm a graphic designer. Color theory is a Thing. Being able to pick colors accurately is Kind of A Big Deal. To not be able to pick a color accurately, for my own walls, even if it was just for a closet, became something of a professional failing for me.
I hemmed. I hawed.
I bought new Ultra White paint.
But it didn't feel right.

The revelation came after coat #3 in what I'll call the "new" closets. These are the closets in the bedrooms over the kitchen and dining room. They have the tight Victorian floors, and someone took the time to put those floors clear into the closets. After coat of paint #3, "Fresh Cotton" finally presented as it's actual color. And I kind of liked it. Against the wood floor, it wasn't bad. It was warm white, the way I thought it would be.
In the other closets, it was still presenting like crap. There was a number of variables - one, the material. New closets are made out of some flavor of wallboard (paneling? Drywall?) and old closets are mostly horsehair plaster. Then there was the lighting. New closets are tall and shallow, and let in a decent amount of light. Old closets are half-height and deep, with little natural light. The last variable, and the one I could do the most about, was the floors. New closets are hardwood, old closets were a selection of white, brown, and green paint.
I had some grey floor paint ("Thunderstorm") left over from the basement project. I was going to make do with that and repaint the insides of the old closets. But Thunderstorm is earmarked for painting the basement stairs once I can prop open the bulkhead for an extended time. Plus, while I'm starting loosen up, painting the insides and walls of the half-height closets had gotten downright painful. Floors, with the help of gravity are far easier.
I took a leap, returned a bunch of Ultra White paint to Home Depot and drove over to Koopman's, the local Benjamin Moore dealer.

When you've been using run of the mill paint, and you treat yourself to the Good Paint, it makes it hard to go back. It's just so much nicer to work with. I could drone on about quality paint, but I'll skip that part.

One quart of "Clydesdale Brown" later, I proved my intuition right. "Fresh Cotton" was fine, it was the floors messing with my head.

Old floor.
New floor. (New closet rod too, the trials of which will be in a separate post.)
Old floor (the back is dark green.)
New floor.
Old.
New.

It is with great pleasure that I pronounce the closets are painted and done, all but the hardware, which will be it's own post. I have to let those painted floors cure for about a week before I go stacking tupper-tubs on them, but it's so nice to walk up and just look at them. All nice and clean and done.

Wednesday, March 20, 2019

On Paint

Bear with me. I've been stuffing and unstuffing myself into awkward closet spaces since Saturday. My everything aches.

Say it with me - No one is going to be in your closets looking for brush marks.
No one.
Not your realtor, not your friends, not your mother.
No one reading this blog (Hi Mom! Hi Dad!) are in the real estate market at the level where we have to worry about a potential buyer showing up and hearing, "Oh My God, we simply can not buy this house Chad, there's brush lines in the closets!"
No one cares, as long as there's ample clean space that holds stuff.
If you're going to take it upon yourself to overhaul the closet situation in a cobbed old house - here's a tip. You're going to be wedging yourself into some very uncomfortable places. Maybe go on a diet, and take a month or two of yoga before you start. Stretch liberally.
Then, and I can't say this enough, buy the good paint.
It seems counter intuitive, right? It's just a closet, cheap paint should be fine. But here's the thing - even though you cleaned the space (contortion act #1) and then primed the space with stain blocking Kilz (contortion act #2) and laid down a coat of paint (contortion act #3) you're going to look at the uneven streaky surface and know deep down in your heart (that even though it's just a closet) you're going to have to wedge yourself back in there for a second coat of paint.
If you'd just bought the good paint with primer and crud built in, you'd be done. But no, because you got the cheap paint, you're got to get back in there for round 4, little buddy. Ready the aspirin.
At least you'll have fun stories for your chiropractor. (Shout out to Dr Dan!)

A note about color.
Warm white seemed like a good idea at the time. It was cold out, so anything that promised warm seemed like a good idea.
But you don't like warm white. It's not white. It's not yellow.
If you want yellow, buy yellow. If you want white, get white. You're stuck with it now for the closets, because you've got a gallon of it, (and no one is going to look critically in the closets anyway and if they do, get new friends.) Once the closets are done, you're going to use whatever's left for primer. Or to paint beehives. Maybe once you paint the floors, it won't be so bad, but right now, against the old green floors, it's just horrendous. You're going to have to go get warm-toned floor paint to try to salvage this, friend. Brown might work. Good luck.

But it's the first day of spring! Now we begin to see what lives here with me, other than the birds and the squirrels.
Promises of things to come.

Tuesday, March 19, 2019

Everything hurts, but everything is primed.

Painting upside down and backwards is going to keep my chiropractor in business. But all the closets are now primed. It's already brighter, if not perfect.
(It's an old house. It will never be perfect, but it can be better.)

Cleaner!

Brighter!

The plaster is going to be what it's going to be. I'm not going to waste my time tearing it out and replacing it if it's going to stay put. Some of it's a little loose, but so far so good. This is the bedroom that had the green trim.
More plaster, out in the hallway.

Primed!

Next up - the application of "Fresh Cotton" and "Thunderstorm". I hope the slightly warm white plays ok with the grey floor paint I already have from the basement door.
They are closets. I really don't need to overthink colors in the closets.